 Avg. 4 min read
 How to Add Users to your Hello Retail Account
This guide explains how to add users to your Hello Retail account.
If you want to share access to your dashboard with an external agency or a colleague, you can invite them as users.
Users and agencies can access multiple company dashboards with a single email address, as long as they have been invited to each company.
Login
To get started, log in to your Hello Retail account and navigate to the correct company dashboard.
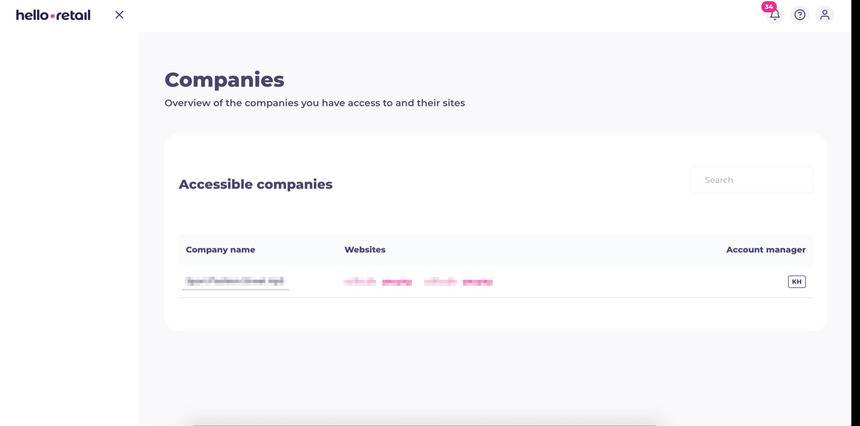
- Log in at my.helloretail.com.
- From the Accessible companies overview, click on the company you want to manage under the Websites column.
Adding Users Through Invites
-
From the dashboard, click your account logo in the top right and select Users from the drop-down menu.
-
Scroll down to the Users with access section and click Invite new user.
-
In the pop-up window, enter the email address(es) of the person you want to invite and click Send invite. This video shows steps 1 to 3 for adding more people to the account through invites.
-
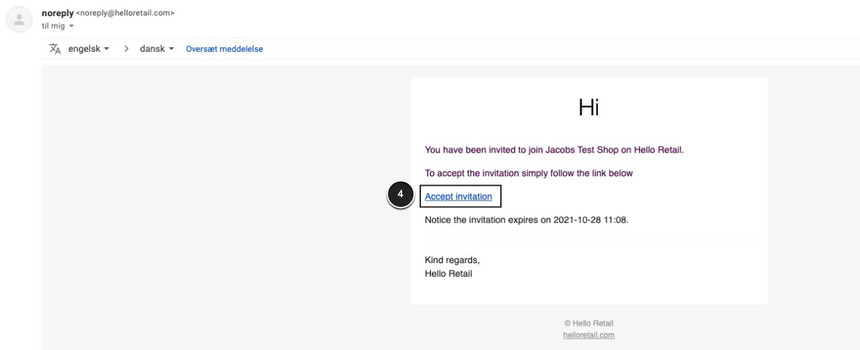
The invited person will receive an email with a link to accept the invitation. This link directs them to the Hello Retail sign-in or sign-up page.
-
While the invitation is pending, the user appears in the Users with pending invitations list.

-
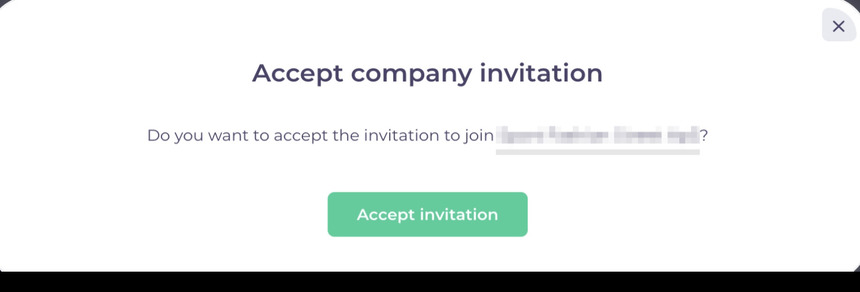
After accepting the invitation, the new user is prompted to either sign in or create a new account.
-
When they complete sign-in or sign-up, they appear in the Users with access list.
Two different scenarios with signing in or signing up:
- Scenario 1: If the person already has a Hello Retail account, they should sign in with their existing credentials.
- Scenario 2: If the person is new to Hello Retail, they must sign up by completing the required fields.
Deleting a Pending Invitation
If an invitation is no longer needed, you can delete it:
- In the Users with pending invitations column, find the user and click Delete invitation.
- Confirm the deletion in the pop-up. The invitation is removed, and the user is not notified.
Revoking User Access
If a user no longer needs access, you can revoke their permissions:
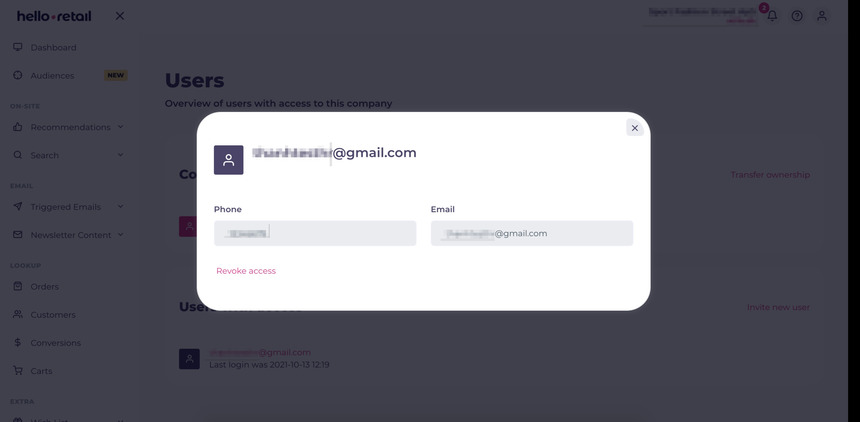
- In the Users with access column, click on the user's email.
- In the pop-up, click Revoke access. The user's access is removed immediately, and they are not notified.
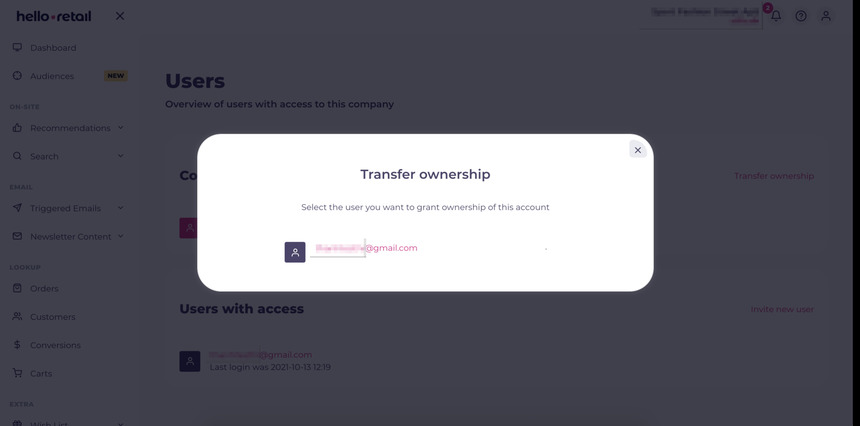
Transferring Account Ownership
You can transfer ownership of the account to another user with existing access:
- From the Users overview page, click the Transfer ownership button.
- Select the new owner from the list of users in the pop-up.
If you have any questions regarding this guide, please contact Support or your designated account manager.