 Avg. 20 min read
 Introduction to feeds
This article explains the role of feeds in a successful integration between your webshop and Hello Retail. For an in-depth guide to the technical requirements and options when creating feeds, see developer.helloretail.com/guides/feeds/
What is a feed?
A feed is a common way to exchange data between systems over the Internet. In a typical setup, a webshop writes product data to a file, uploads it to a server, and other systems retrieve it on a schedule. A well-known example is the Google Shopping feed, which Hello Retail can also consume.
Formats
Hello Retail supports feeds in JSON, XML, or CSV.
What should be in the feed?
Include all data Hello Retail must process for your specific setup, such as product identifiers, titles, pricing, availability, and any additional attributes required by your configuration.
Access
Feeds must be accessible via a URL. You can: - Allow public access. - Allowlist specific IPs. - Require HTTP Basic Authentication.
Contact our support team to configure IP allowlisting or Basic Authentication.
How we request a feed
After you set up a feed in our system, there are two ways it can be requested:
1. Manually log in and start a feed run.
2. Enable automatic scheduling to run the feed on a set interval.
Updating
Hello Retail typically checks for updates every 1 to 24 hours. Ensure your feed is updated at least as frequently as the schedule you configure.
How we process a feed
When a feed runs, it goes through these stages:
1. The feed is queued and waits to be picked up.
2. The feed file is downloaded.
3. The feed is parsed into items and written to the Hello Retail database.
Processing time varies by feed size and network conditions.
Synchronization: create, update, delete
The feed system synchronizes data from your external system with ours. It supports:
- Creation of new data: If permitted, new items in the feed are created in our system.
- Updating existing data: Changes in feed data update existing items.
- Deletion of data: If permitted, items missing from the feed are marked for deletion.
Each feed can be configured to allow or disallow creation and deletion. By default, all feeds can update existing data.
Naming a feed
Assigning names to feeds makes them easier to identify than by URL. This helps your team understand the purpose of each feed.
To assign a name, go to the Feeds tool in the menu bar. You will see an overview of your feeds, including Product feeds, Order feeds, Content feeds, and Permission feeds.
Find the table for the desired feed type and click the feed name you want to edit. This opens the feed edit view.
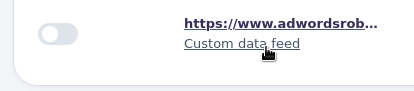
[Picture of clicking feed name in table row in view Feeds Overview]
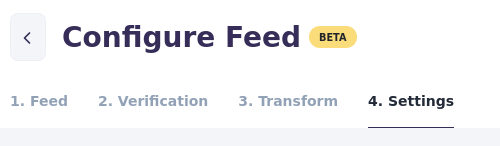
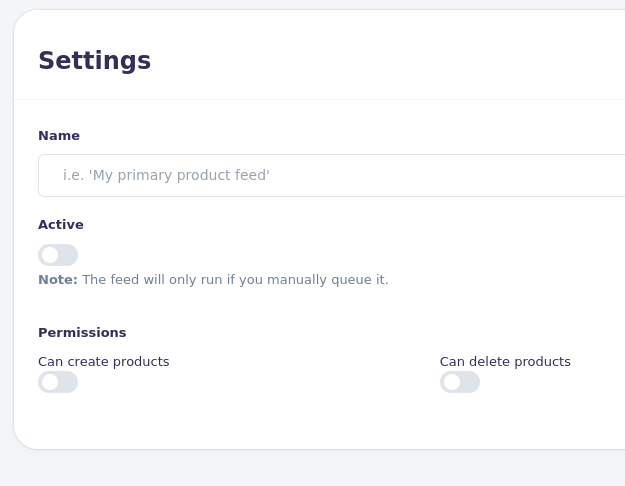
At the top, click the "Settings" tab to open the settings view.
Enter a name in the "Name" input field.
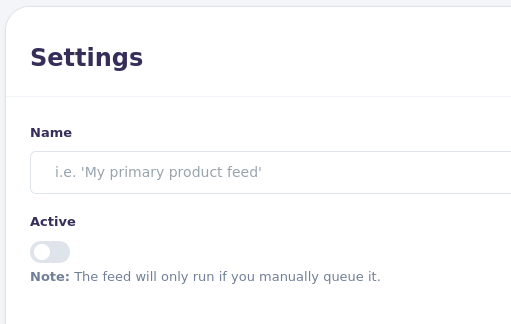
[Picture of settings options in view Product Feed Edit]
Click "Save" at the bottom to apply changes.
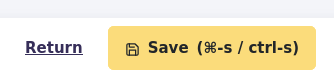
[Picture of Save button in view Product Feed Edit]
Allow a feed only to update data
By default, all feeds can update data. If configured, a feed can also create and delete data.
To view or change a feed’s permissions, go to the Feeds tool in the menu bar.
You will see an overview of your feeds, including Product feeds, Order feeds, Content feeds, and Permission feeds.
Find the table for the desired feed type and click the feed name to open the edit view.
[Picture of clicking feed name in table row in view Feeds Overview]
At the top, click the "Settings" tab.
[Picture of tab "Settings" in view Product Feed Edit]
In the general settings, use the toggles to control create and delete permissions.
A feed that only updates data has both create and delete toggles turned off:
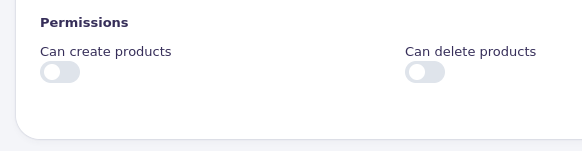
[Picture of a Product Feed that only updates data in view Product Feed Edit]
If your feed does not match the above, switch off create and delete, then click "Save" at the bottom.
[Picture of Save button in view Product Feed Edit]
Allowing a feed to create data
To allow a feed to create data (for products, orders, content, or permissions), go to the Feeds tool in the menu bar.
You will see an overview of Product feeds, Order feeds, Content feeds, and Permission feeds.
Find the table for the desired feed type and click the feed name to open the edit view.
[Picture of clicking feed name in table row in view Feeds Overview]
At the top, click the "Settings" tab.
[Picture of tab "Settings" in view Product Feed Edit]
In the general settings, you can enable create and delete as needed.
Note
All feeds can update existing data by default. There is no toggle for update permissions.
[Picture of tab "Settings" in view Product Feed Edit]
Toggle permissions on or off depending on the required behavior.
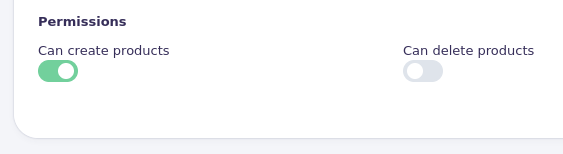
[Picture of create permissions enabled for a Product Feed in view Product Feed Edit]
Click "Save" at the bottom to apply changes.
[Picture of Save button in view Product Feed Edit]
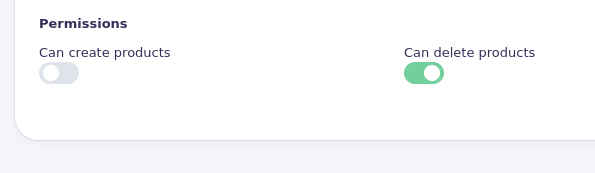
Allowing a feed to delete data
Please read the section "Synchronization: create, update, delete" to understand what the feed permissions control.
To allow a feed to delete data (for products, orders, content, or permissions), go to the Feeds tool in the menu bar.
You will see an overview of Product feeds, Order feeds, Content feeds, and Permission feeds.
Find the table for the desired feed type and click the feed name to open the edit view.
[Picture of clicking feed name in table row in view Feeds Overview]
At the top, click the "Settings" tab.
[Picture of tab "Settings" in view Product Feed Edit]
In the general settings, you can enable create and delete as needed.
Note
All feeds can update existing data by default. There is no toggle for update permissions.
[Picture of tab "Settings" in view Product Feed Edit]
Toggle permissions on or off depending on the required behavior.
[Picture of create permissions enabled for a Product Feed in view Product Feed Edit]
Click "Save" at the bottom to apply changes.
[Picture of Save button in view Product Feed Edit]
Automatic schedule a feed
To set up automatic scheduling, go to the Feeds tool in the menu bar. You will see an overview of Product feeds, Order feeds, Content feeds, and Permission feeds.
Find the table for the desired feed type and click the feed name to open the edit view.
[Picture of clicking feed name in table row in view Feeds Overview]
At the top, click the "Settings" tab.
[Picture of tab "Settings" in view Product Feed Edit]
Toggle the "Active" switch to enable scheduling for the feed.
[Picture of settings options in view Product Feed Edit]
Select the scheduling interval.
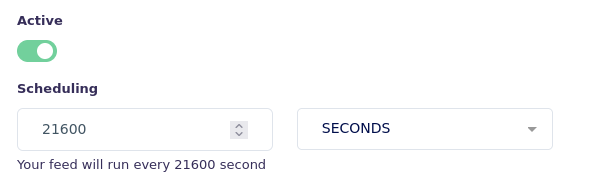
[Picture of an active schedule in view Product Feed Edit]
Click "Save" at the bottom to apply changes.
[Picture of Save button in view Product Feed Edit]
Creating a new feed
To create a feed, open the Feeds tool in the menu bar. You will see an overview across the supported types: Product feeds, Order feeds, Content feeds, and Permission feeds.
In the table for your desired type, click "Add new". You will then select the appropriate feed connector type.

[Picture of the "Add New" green button on Products feed table in view Feed Overview]
The creation steps vary by feed type (Products, Orders, Content, Permissions) and connector type. Some combinations are documented. You can also start the flow and follow the on-screen guidance.
Archiving a feed
To archive a feed, go to the Feeds tool in the menu bar. You will see the feeds grouped by type: Product feeds, Order feeds, Content feeds, Permission feeds.
In the table for the feed you want to archive, click the "..." button on the same row.
[Picture of the "..." feed table row button in view Feed Overview_]_
In the menu, select "Archive".
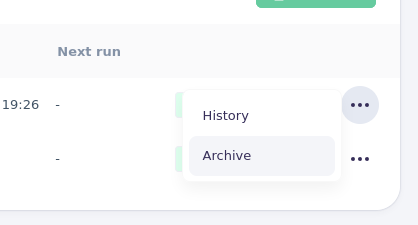
[Picture of the sub menu of the "..." feed table row button in view Feed Overview]
When archived, the feed is removed from the table and any automatic scheduling stops.
Feed runs that are currently processing continue until completion.
Queued runs that have not yet started are cancelled when the system detects the feed is archived.
Archiving does not permanently delete the feed, and you can restore it later.
To restore, see "Restoring an archived feed".
Restoring an archived feed
To restore an archived feed, open the Feeds tool in the menu bar.
Click the "Archive" tab at the top, next to the "Overview" tab.
This shows tables with all archived feeds.
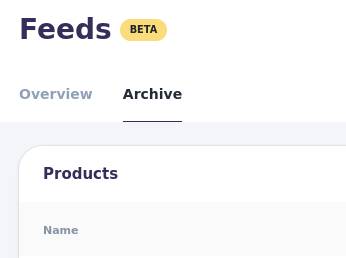
[Picture of the "Overview" and "Archive" tab in view Feeds Overview]
Find the table for your feed type and locate the feed to restore.
Click the "..." button on the same row to open the menu.
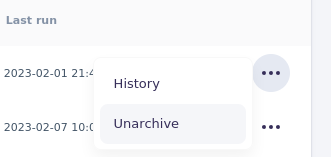
[Picture of the "..." sub menu in view Archive Overview]
Choose "Unarchive". The feed disappears from the Archive view.
Return to the "Overview" tab to find the restored feed.
Note
If the restored feed previously had an active schedule, scheduling is paused after restore. Toggle the schedule switch in the overview to resume. This prevents unintended automatic changes to your data.

[Picture of the toggle in table row in view Feeds Overview]
Manually run a feed
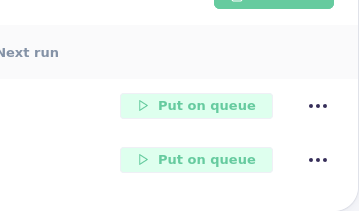
To manually run a feed, open the Feeds tool in the menu bar. You will see Product feeds, Order feeds, Content feeds, and Permission feeds.
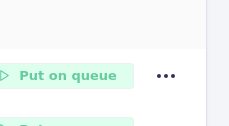
In the table for your desired type, click the green "Put on queue" button on the row of the feed you want to run.
[Picture of the green "Put on queue" button in table row in view Feeds Overview]
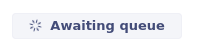
The row updates and the button changes to "Awaiting queue".
[Picture of the grey "_Awaiting queue" button in table row in view Feeds Overview]_
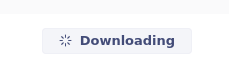
After a short time, it changes to "Downloading" when processing starts.
[Picture of the grey "_Downloading" button in table row in view Feeds Overview]_
When the download completes, it changes to "Parsing".
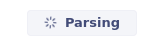
[Picture of the grey "Parsing__" button in table row in view Feeds Overview]
Finally, when parsing is done, the button returns to "Put on queue".
Note
If the status button shows Awaiting queue, Downloading, or Parsing, click it to open the Feed Run Details view and monitor progress.
Interrupting a running feed
If a feed is running and you need to stop it, you can interrupt the processing. This is useful if you want to re-queue after changing configuration.
When you interrupt a feed, the system stops as quickly as possible at safe interruption checkpoints.
Note
Depending on the progress of the run, processing may complete before the interrupt takes effect.
To interrupt a running feed, open the Feeds tool in the menu bar.
In the table for the relevant feed type, locate the feed with a gray status button: "Awaiting queue," "Downloading," or "Parsing".
Click the gray status button.
[Picture of the grey "_Awaiting queue" button in table row in view Feeds Overview]_
[Picture of the grey "_Downloading" button in table row in view Feeds Overview]_
[Picture of the grey "Parsing__" button in table row in view Feeds Overview]
You are taken to the Feed Run Details view.
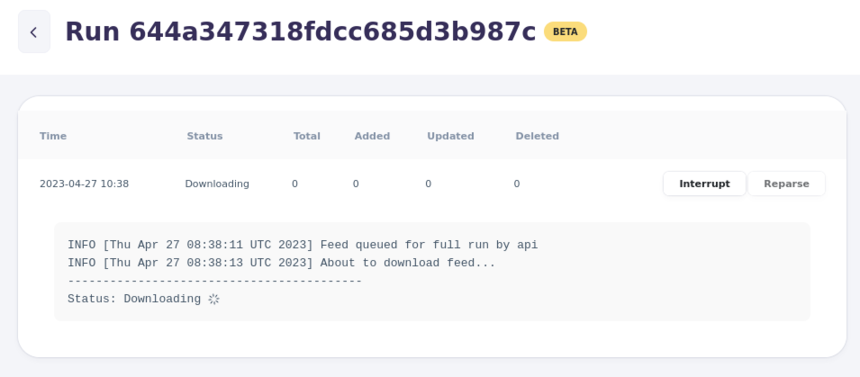
[Picture of an active feed run in view Feed Run Details]
Use the interface there to interrupt the run.
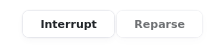
[Picture of "Interrupt" and "Reparse" button of an active feed run in view Feed Run Details]
Note
If the button is green and says "Put on queue", the feed is not running and there is no active run to interrupt.
Feed History
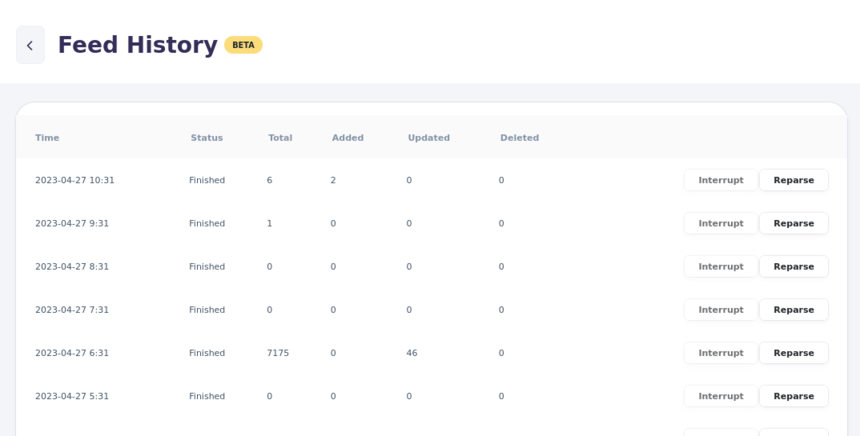
[Picture of view Feed History]
Feed History (also referred to as "feed run history") provides insight into feed performance over time.
From this overview, you can see failures and how many items were created, updated, or deleted.
Feed History also includes actions:
- Reparse a previous run: Parse the previously downloaded data again using the latest configuration.
- Interrupt a running or scheduled run: Send an interrupt signal to stop processing.
Click any row to open the Feed Run Details view for that run with additional information.
You can read more about the Feed Run Details view under "Feed Run Details".
Understanding the information
The stats of the feed run
In Feed History, the table lists current and previous runs of a feed.
Each row shows the processed item counts: created, updated, and deleted.

[Picture of the stats of a particular row in Feed History]
Time: When the feed queue ticket was created.
Status: The processing status of the feed queue ticket. Possible values: - Interrupted - Interrupting.. - Cool down - Awaiting queue - Downloading - Parsing - Failed - Finished
Total: Total number of items found in the run
Added: Number of items created in our system in the run
Updated: Number of items updated in our system in the run
Deleted: Number of items deleted in our system in the run
Reparsing a previous feed from Feed History
In Feed History, you can view scheduled and previous runs.
If a previous run successfully downloaded the feed, click "Reparse" on the row.

[Picture of "Reparse" button in table row in view Feed History]
This starts a new feed run that reparses the stored data from that run using the latest configuration.
The feed is not downloaded again; the previous payload is reused.
Reparsing is useful for testing configuration changes without waiting for a new download.
Interrupting a feed run from Feed History
In Feed History, you can view scheduled and previous runs.

[Picture of "Interrupt" button in table row in view Feed History]
If a run is scheduled or processing, click "Interrupt" to send an interrupt signal.
The system will stop the run as quickly as possible.

[Picture of "Interrupt" button clicked and table row shows "Interrupting.." in view Feed History]
Feed Run Details
Understanding the information of a feed run
The stats of the feed run
In Feed Run Details, you can see the same statistics as in Feed History, including created, updated, and deleted counts for the run.
[Picture of the stats of a particular Feed Run Details]
Time: When the feed queue ticket was created.
Status: The processing status of the feed queue ticket. Possible values: - Interrupted - Interrupting.. - Cool down - Awaiting queue - Downloading - Parsing - Failed - Finished
Total: Total number of items found in the run
Added: Number of items created in our system in the run
Updated: Number of items updated in our system in the run
Deleted: Number of items deleted in our system in the run
The ID of the feed run
Each feed run has an ID. It is often easiest to reference a run to support by providing this ID. You can find it in the title next to "Run".
You can also copy and share the URL of your browser. Other users with access or support can open the run directly.
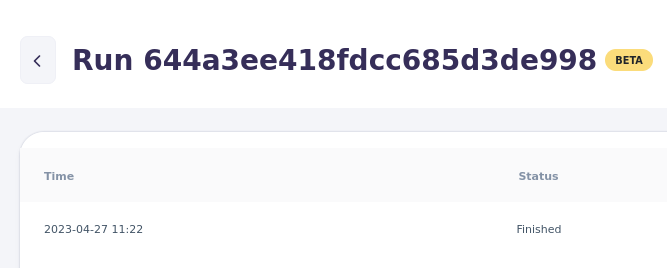
[Picture of the ID of a particular Feed Run Details]
Unlike Feed History, Feed Run Details also shows a log with detailed processing information.
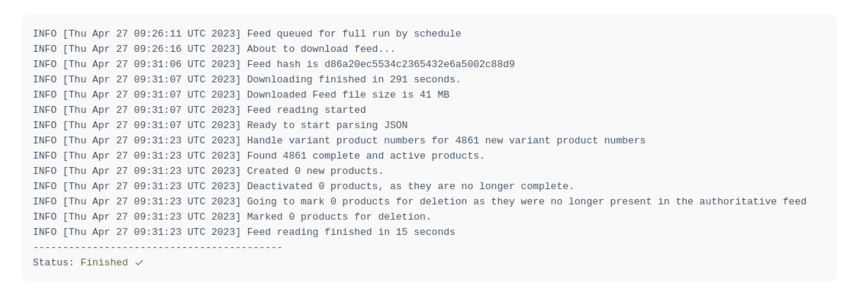
[Picture of the log of a particular Feed Run Details]
If the feed run is queued or processing, the view updates automatically.
The log shows current status and any issues detected during the run.