 Avg. 4 min read
 Set up an Auto Campaign Configuration
This guide shows how to create and configure an Auto campaign with personalized product recommendations.
Prerequisite
Before you create a campaign, you must have a design for your Newsletter Content. To create a design, click here. When your design is ready, continue with this guide.
Create an auto campaign configuration
- Start by logging into your Hello Retail account. In the left-hand menu, under Email, click Newsletter Content to open the drop-down.
- From the drop-down, click Auto campaigns.
- Click Create new auto campaign config.
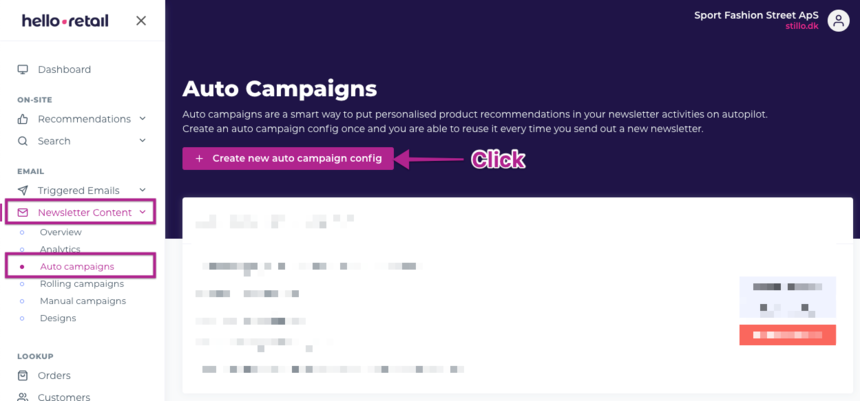
The screenshot shows steps 1–3.
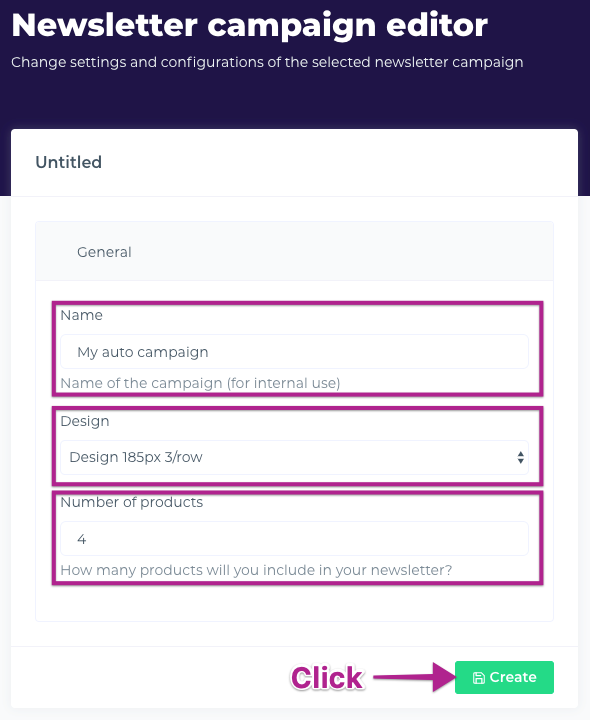
Name, design and products
- Provide a name.
- Select your design.
- Choose the number of product recommendations to display for this Auto campaign configuration.
- Click Create.
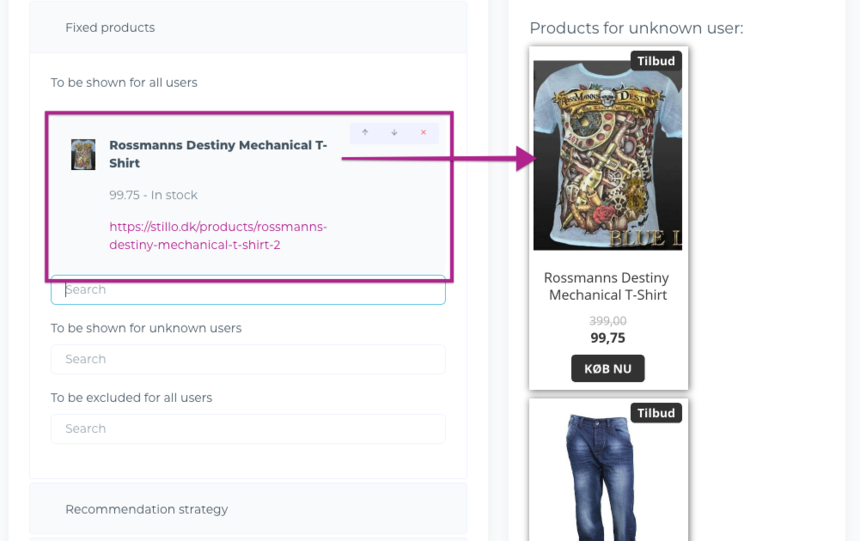
Fixed products
Under Fixed products, you can specify products that should be displayed to all users, regardless of browsing or purchase history.
Use this to highlight new arrivals, high-stock items, or similar. You can also: - Add fixed products for all unknown users. - Exclude specific products for all users.
Note
Fixed products are removed from Auto campaigns after the first send. For this reason, using fixed products with Auto campaigns is not recommended.
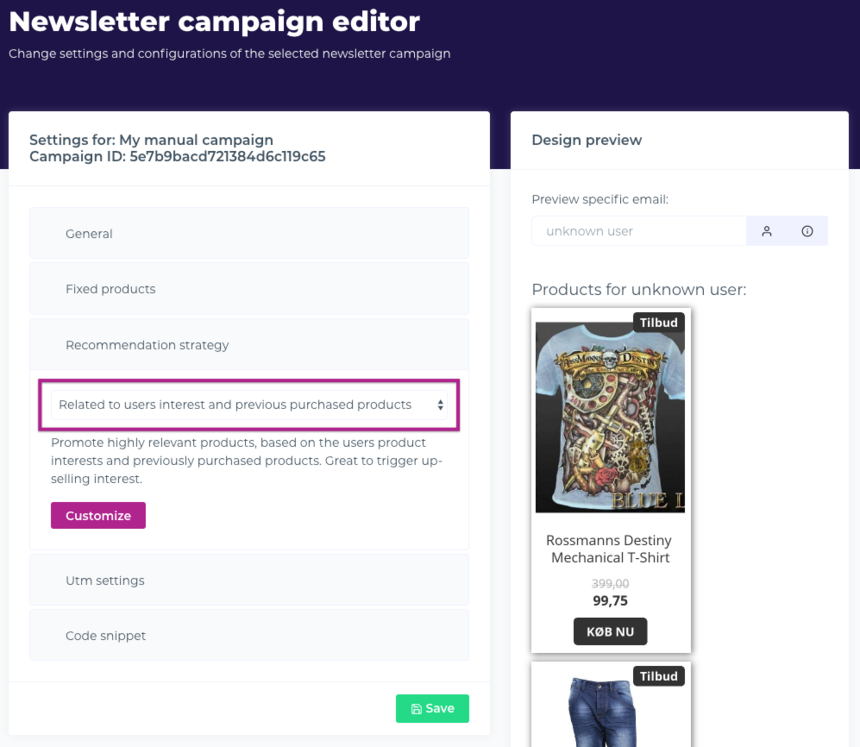
Recommendation strategy
In this step, select the Recommendation strategy for your Auto campaign configuration.
Available options: - Related to users' interest and previous purchased products: Promote highly relevant products based on users’ interests and past purchases. Useful for cross-sell and up-sell. - Promote users previously purchased products: Re-display previously purchased products. Use this for replenishable or repeat-purchase products. - Promote products on sales: Prioritize relevant products that are on sale. - Classic retargeting: Prioritize users’ previously visited products and related items. - Click Customize to build a custom strategy with multiple steps. Steps are executed in order, and the first step has the highest priority.
After selecting your preferred algorithm (recommendation strategy), click Save.
Code snippet
Under Code snippet, choose your newsletter platform (ESP). A code snippet will be generated to render the product recommendations in your newsletter.
Copy this snippet into your newsletter template in the ESP. Each time you send a newsletter using that template, a campaign is automatically created for this Auto campaign configuration.
Click Save to save the campaign.
Finalising the setup of your Auto campaign
After completing the steps above, your Auto campaign configuration is active. Verify that your newsletter platform is selected correctly and click Save.

After you send the first newsletter using this Auto campaign configuration, you will see a list of all automatically created campaigns inside the specific Auto campaign config.

Note
Auto campaigns are only supported with the following newsletter platforms:
- MailChimp
- Campaign Monitor
- Ubivox
- Apsis
- Bizwizard
- Heyloyalty
- Klaviyo
- Nomiro
- SmartFocus
If you have any questions about this guide, please contact Support or your account manager.