 Avg. 2 min read
 Apsis Auto Campaign Setup
This guide explains how to set up auto campaigns in Apsis.
Prerequisite
Before you can create an auto campaign, you must first create a newsletter content design. To learn how, click here. Once your design is ready, follow the steps below to integrate with Apsis.
If you have done the above, we can go on to setting it up in Apsis.
Step 1: In your Hello Retail account, navigate to Newsletter Content > Auto campaigns and click Edit auto campaign config.
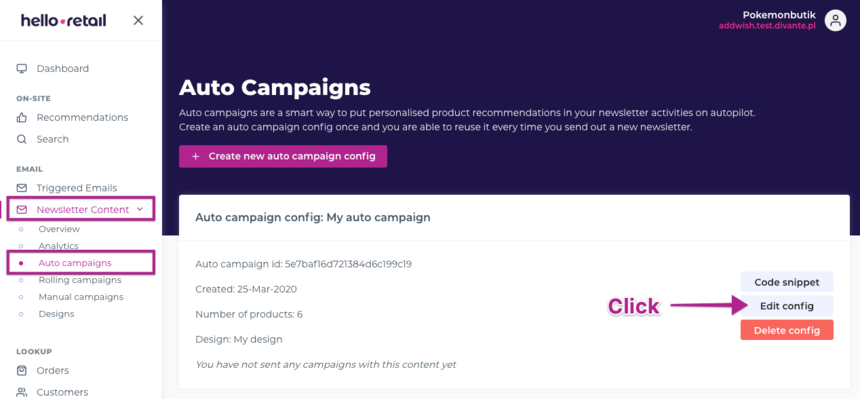
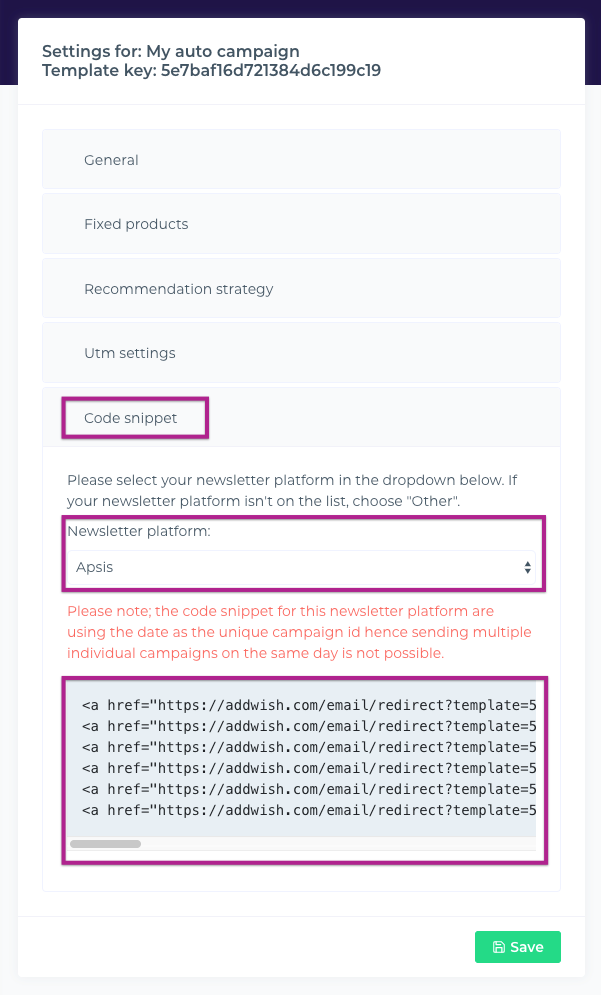
Step 2: Click Code snippet and ensure Apsis is selected in the drop-down. Copy the code to the clipboard (CTRL+C / CMD+C).
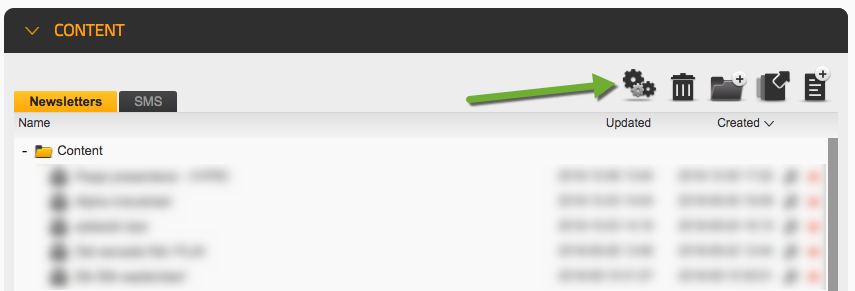
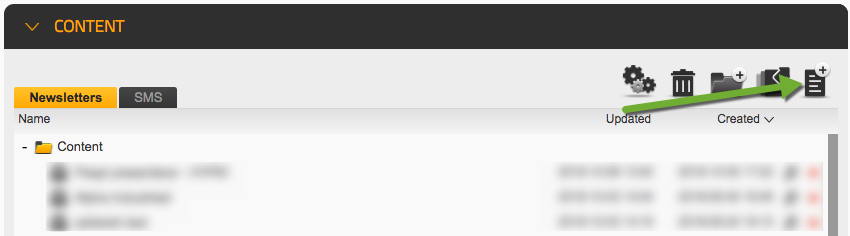
Step 3: Go to your Apsis account and click the gear icon.
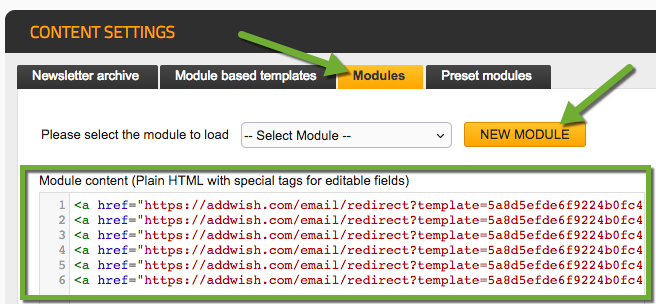
Step 4: Click the Modules tab and then New module. Paste the code into the empty box (CTRL+V / CMD+V).
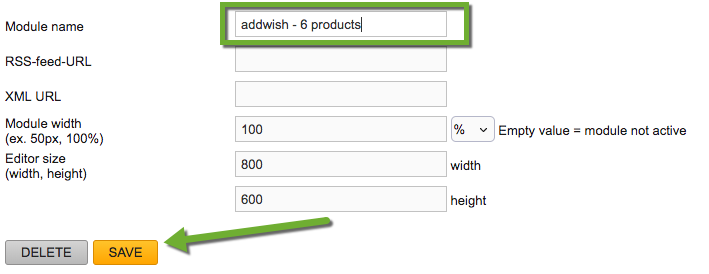
Step 5: Give the new module a name and click Save. Adjust the module size to fit your newsletter layout.
Step 6: Go back to the start page in Apsis, and create a new newsletter or edit an existing one.
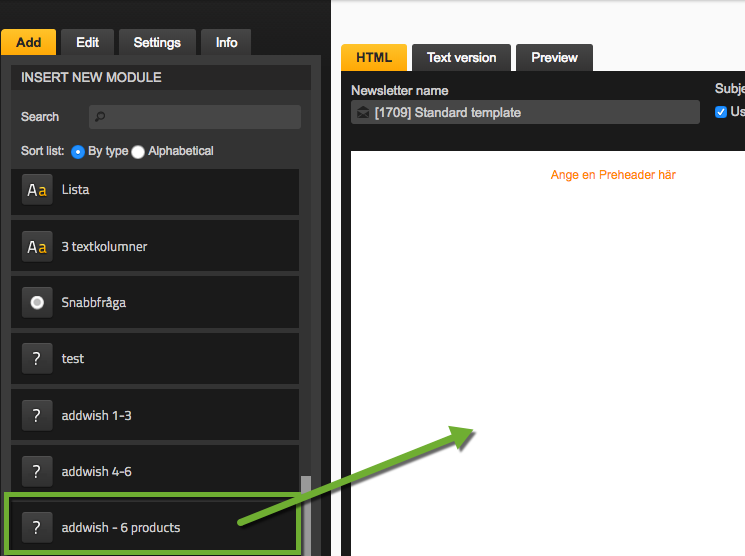
Step 7: Drag the newly created Hello Retail module into the newsletter where you want the products shown.
Step 8: You will likely not see products immediately in the editor. Click the Preview tab.

Step 9: Select an email address to preview the generated newsletter with recommendations.
You are now good to go. You can adjust the number of products and the module size to fit your layout.