 Avg. 4 min read
 Apsis One — Newsletter Content
Adding Product Recommendations from Hello Retail directly to your Apsis One newsletter is straightforward, as Apsis One provides an integration tailored to Hello Retail. This guide walks you through the setup.
If you are new to Hello Retail Newsletter Content, read our guides on how to create campaigns and what the different campaign types can offer. You can find more information here. If you are already familiar with Newsletter Content, continue reading.
Create a new Asset in Apsis One
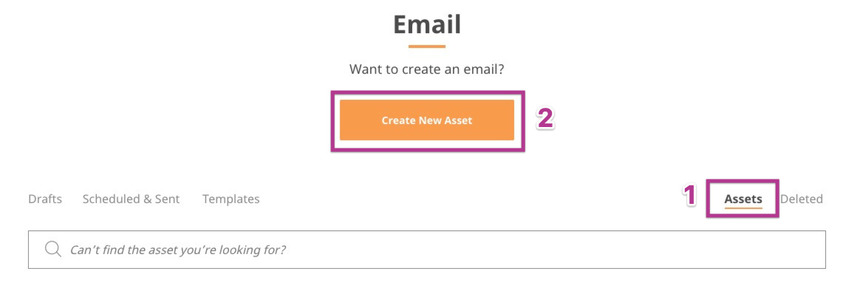
Log in to your Apsis One account and go to Email. Create a new Asset under Asset -> Create New Asset.
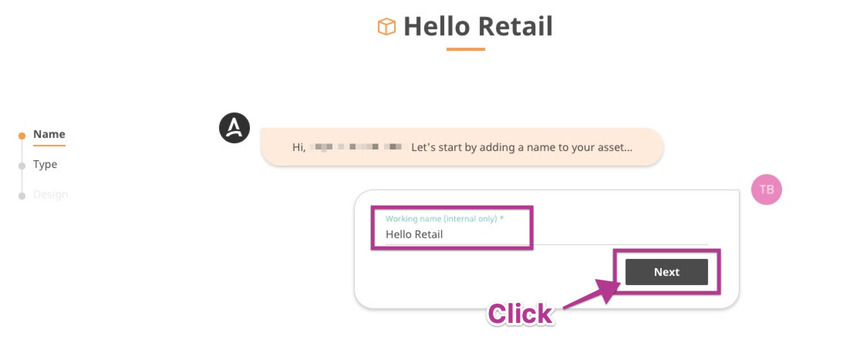
 Name the new Asset and click Next.
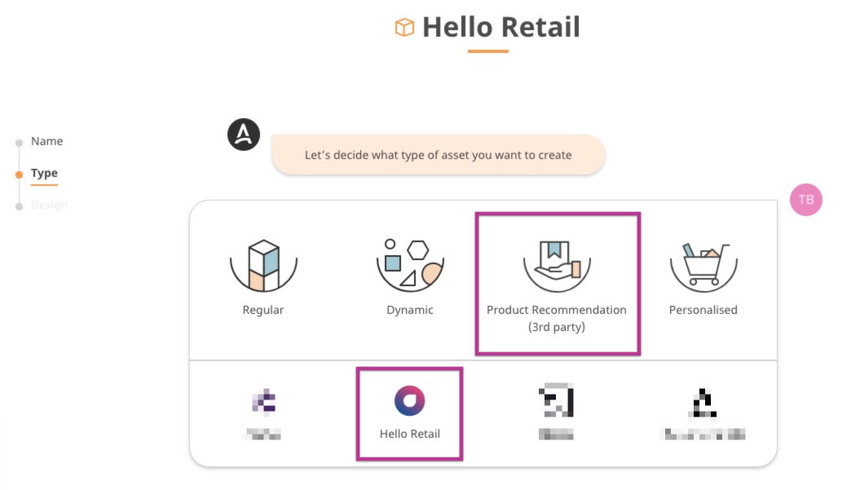
For the type of Asset, select Product Recommendation (3rd party) and then Hello Retail.
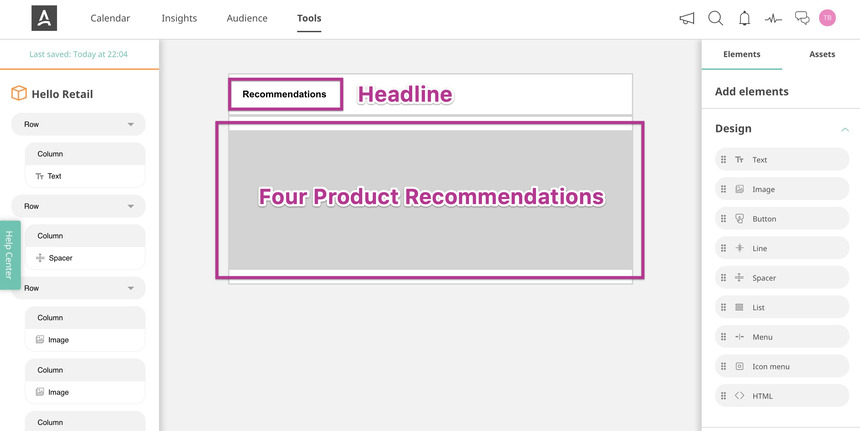
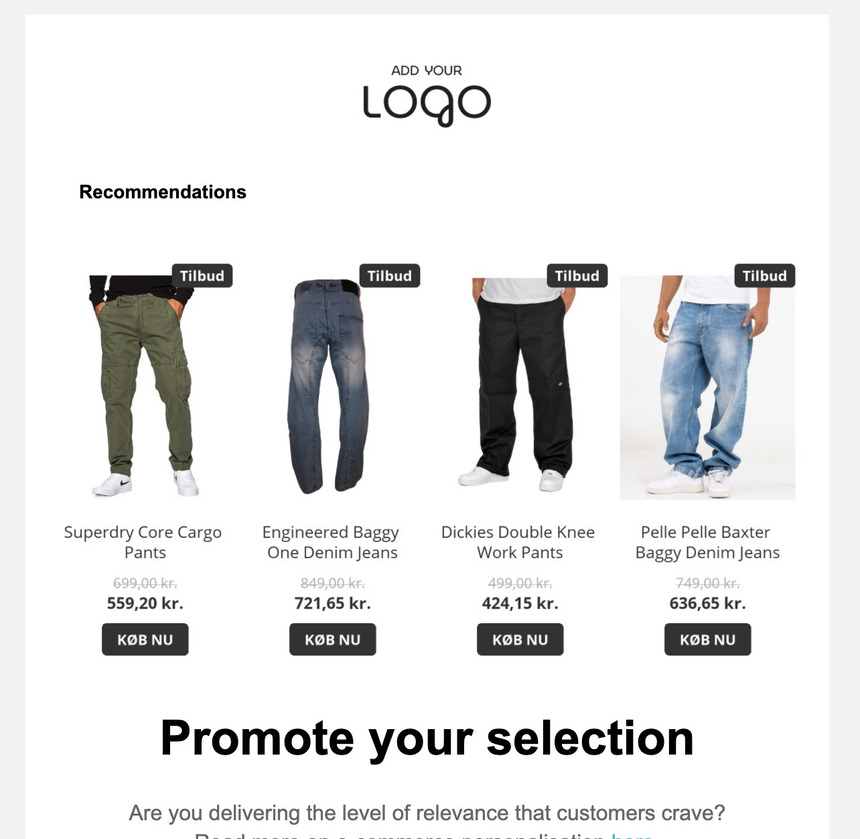
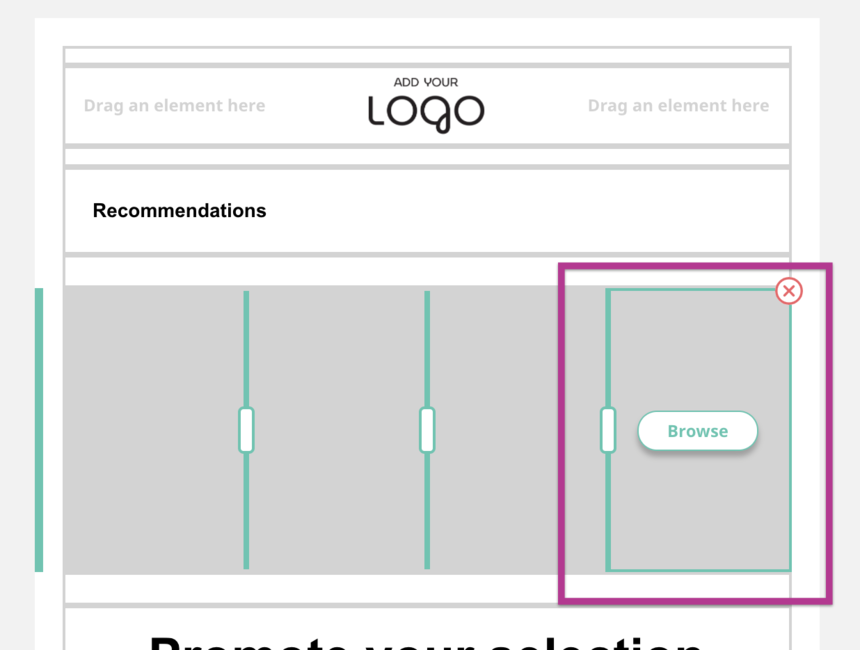
After choosing Hello Retail, the Asset opens with a default headline "Recommendations" that you can change. You will also see four grey boxes (hover to see each is a separate element). Each element represents a single product image.
When the Asset looks as you want, save it by clicking Finish in the lower right corner.
Add the Asset to a newsletter
The Asset is now available to add to a newsletter design. While editing a newsletter, open Assets and drag the Asset into the newsletter design.
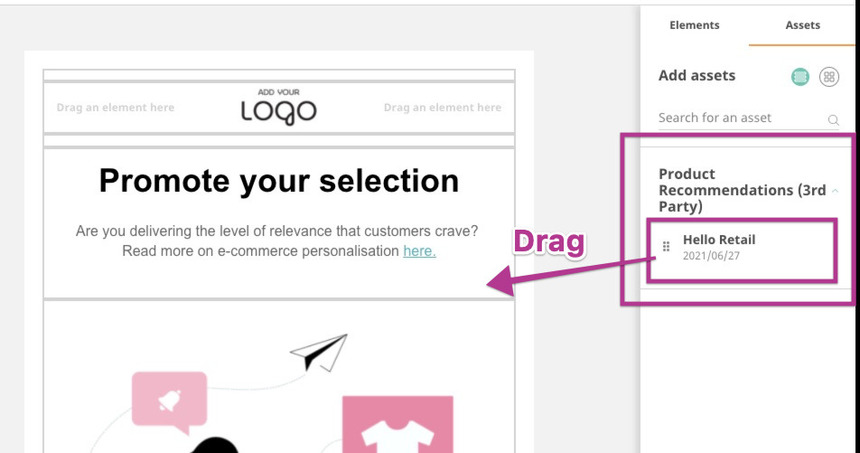
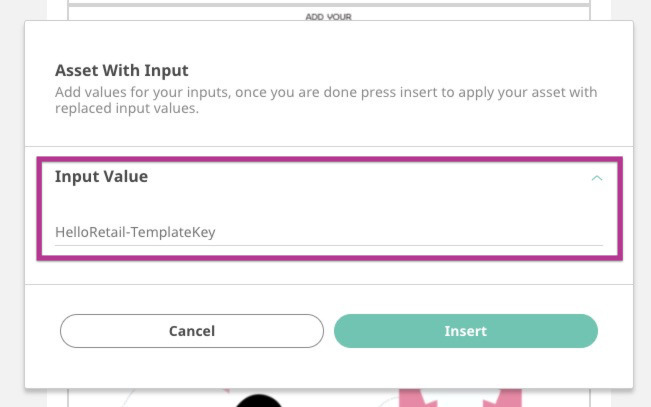
When you drop the Asset, Apsis One prompts for a Hello Retail Templatekey. This key links the Asset to your Hello Retail Newsletter campaign. After linking, the Asset will automatically populate with personalized product recommendations from Hello Retail at send time.
Input the Template id
Log in to your Hello Retail account, go to Newsletter Content, and find the campaign you want to link to the Asset. Each campaign has a unique Template id.
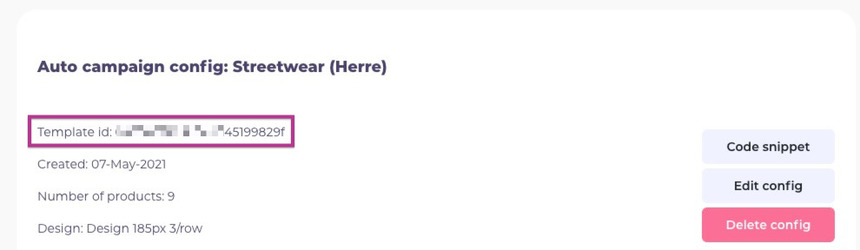
Copy the Template id and paste it into the Apsis One Asset.
The Asset is now linked to the campaign. You will not see product recommendations in the editor because the dynamic tags in the Asset URLs are not populated with real data until preview or send. If you click Preview (at the bottom), Apsis One inserts example data so you can verify the layout.
That’s it. You are ready to send newsletters with personalized Product Recommendations.
Reduce the number of Product Recommendations in the Asset
By default, the Asset includes four Product Recommendations. To remove one, click a grey box and then click the red cross. Resize the remaining three boxes to fill the width of the newsletter.
Add more Assets to the same newsletter
If you need more than four Product Recommendations, create additional Assets instead of reusing the same Asset. Reusing the same Asset duplicates the first four recommendations.
An Asset with four Product Recommendations automatically labels the four products 1, 2, 3, and 4. These labels map to the productNumber parameter that tells Hello Retail which ranked recommendations to use. To show the next four recommendations, create a new Asset with labels 5, 6, 7, and 8. You can name it "Hello Retail 5-8".
Update two URLs for each of the four elements in the new Asset: the image URL and the click-through URL. To change the image URL, hover over an element and click Browse. Under Image URL, you will see the URL.
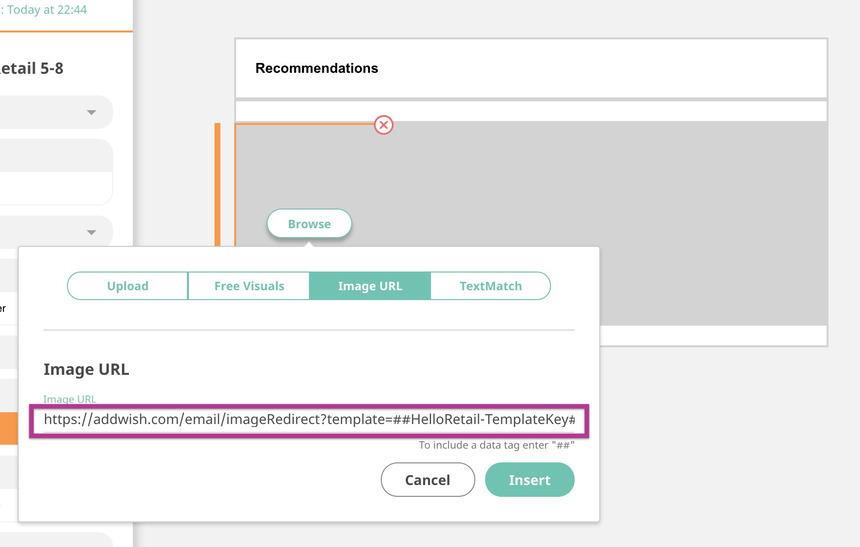
The URL looks like this:
https://helloretail.com/email/imageRedirect?template=##HelloRetail-TemplateKey##&campaign=##com.apsis1.email.system.sent_time.yyyymmdd##&productNumber=1&aw:userEmail=##com.apsis1.attributes.email##
It contains dynamic tags that Apsis One resolves automatically when the Asset is added to a newsletter. Change "productNumber=1" to "productNumber=5" and repeat for each element, using 6, 7, and 8.
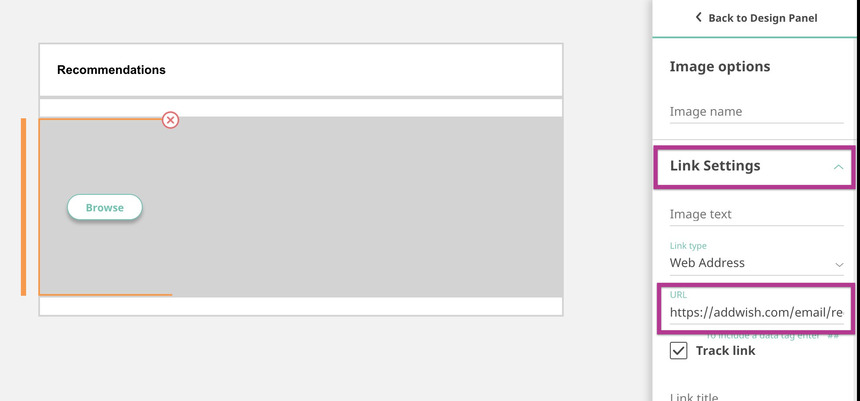
The second URL is located under Link Settings and URL. As before, change "productNumber=1" to "productNumber=5", and repeat with 6, 7, and 8 for the remaining elements in the Asset.
You can now drag both Assets into the newsletter to show 8 unique personalized Product Recommendations in two rows. To add more rows, create additional Assets with the next sequence of productNumber values.