 Avg. 3 min read
 DanDomain Classic installation guide
Installing the Hello Retail JavaScript
Note
This guide is for DanDomain Classic. If you use the latest DanDomain platform, follow this guide.
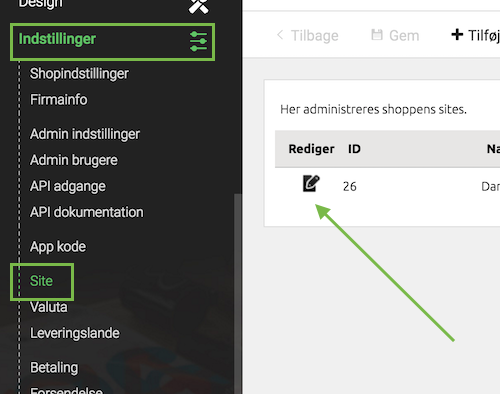
Log in to the admin part of your DanDomain webshop. Navigate to Indstillinger > Site. Click the small edit icon ("Rediger") next to the webshop where you want to add the JavaScript:
Paste your Hello Retail JavaScript and cart tracking at the bottom of the Kodefelt (head section) field:
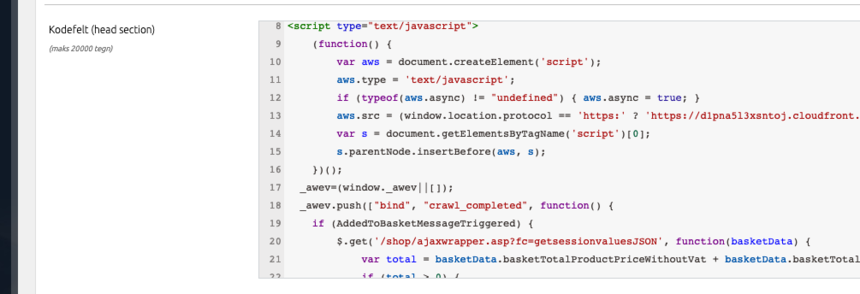
<script async src="https://helloretailcdn.com/helloretail.js"></script>
<script>
    window.hrq = window.hrq || [];
    hrq.push(['init', {}]);
    hrq.push(function(sdk) {
        fetch("/shop/ajaxwrapper.asp?fc=getsessionvaluesJSON")
            .then((response) => response.json())
            .then((basketData) => {
                var total = basketData.basketTotalProductPriceWithoutVat + basketData.basketTotalVat;
                if (total > 0) {
                    var productNumbers = basketData.basket.map(function(p){
                        return p.productNumber.trim();
                    });
                    var quantities = basketData.basket.map(function(q){
                        return q.quantity;
                    });

                    var cartUrl = document.location.origin +
                        '/shop/showbasket.html?AddMultiple=1&ProductID=' +
                        productNumbers.join("|") +
                        '&Amount=' + quantities.join("|");
                    sdk.setCart({
                        total: total,
                        url: cartUrl,
                        productNumbers: productNumbers
                    });
            }
        });
    });
</script>
Remember to save your changes.
Make your product data available for Hello Retail
Expose product data to Hello Retail:
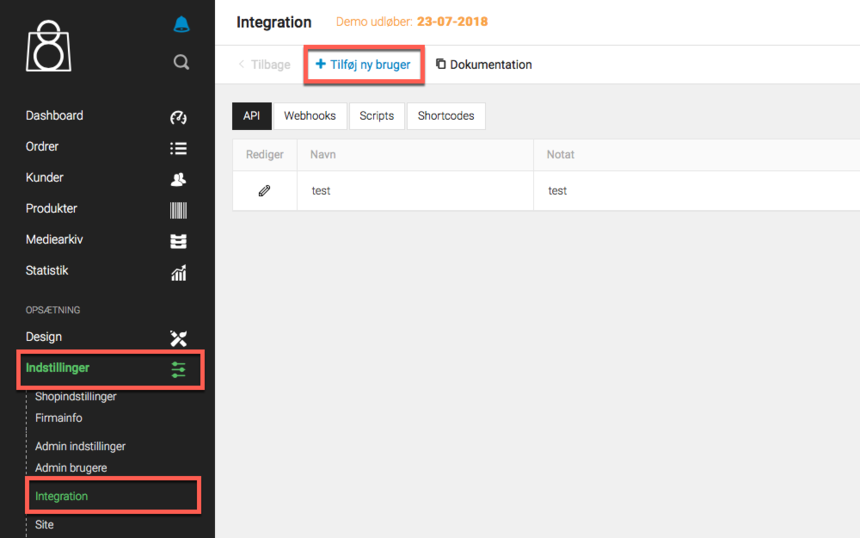
- Navigate to Indstillinger > Integration and choose to add a new user ("Tilføj ny bruger"):
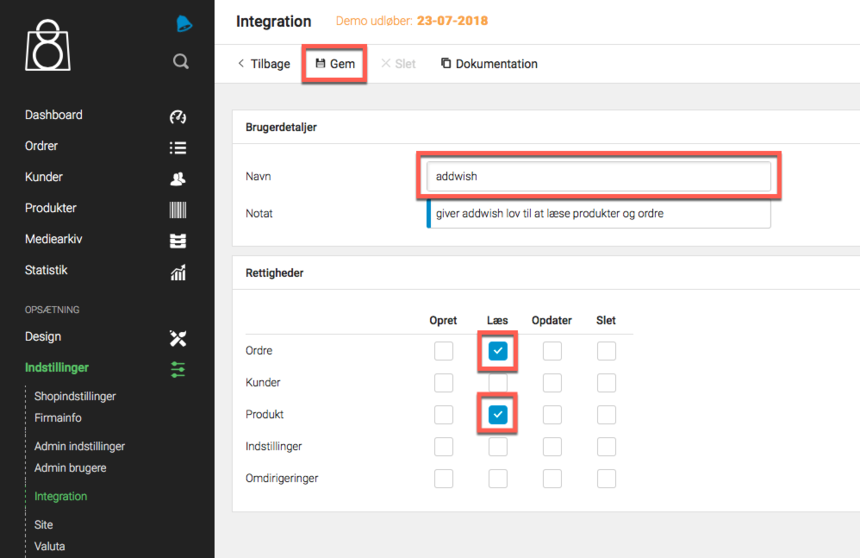
- Fill out the details as shown below and click Gem (notat is optional):
- Copy the generated API key before closing the window. It will be hidden once you close it:

-
Send the API key to Hello Retail along with your site ID and webshop domain (e.g. my-webshop.com).
Note
You can find your site ID under Indstillinger > Site:

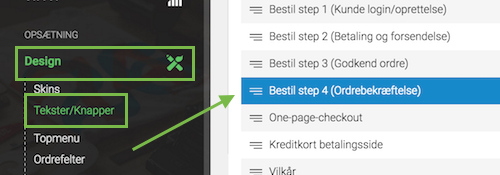
Make conversion data available to Hello Retail
Navigate to Design > Tekster/Knapper, then select the page Bestil step 4 (Ordrebekræftelse)
Add the code below to the field called Kodefelt:

<span class="addwish-conversion" style="display:none" data-total="[[AdWordsSubTotalInclVAT]]" data-ordernumber="[[OrderID]]" data-email="[[CUSTOMEREMAIL]]"></span>
Remember to Save your changes.
Configure Webshop
After the installation and onboarding flow, configure your webshop. Follow this guide:
Optional: Create a blank search page
You may need a blank search page for the Full Search feature.
- Navigate to Design > Egne sider > Opret side:

-
Create an "Indholdsside" with a relevant name, e.g. "Søgeresultater":
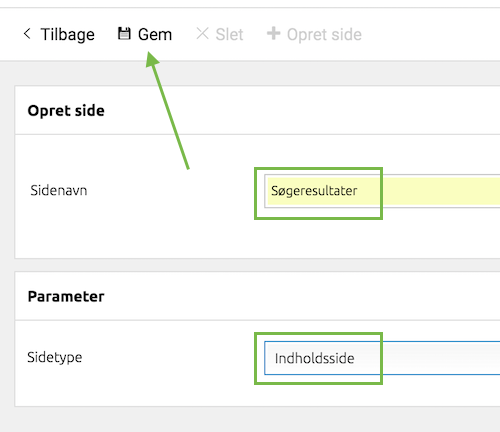
Remember to Save the page. 3. After saving, scroll to the Parameter section to find the page URL:

Share this URL with Hello Retail by emailing support@helloretail.com. The team will finalize the dynamic search setup.
Note
For user tracking compliance, review the cookie tracking documentation and configure consent accordingly: Opt-in and out of tracking.