 Avg. 6 min read
 Miva merchant installation guide
To integrate Hello Retail with your Miva merchant web shop simply follow these few steps:
1. Insert the Hello Retail general script:
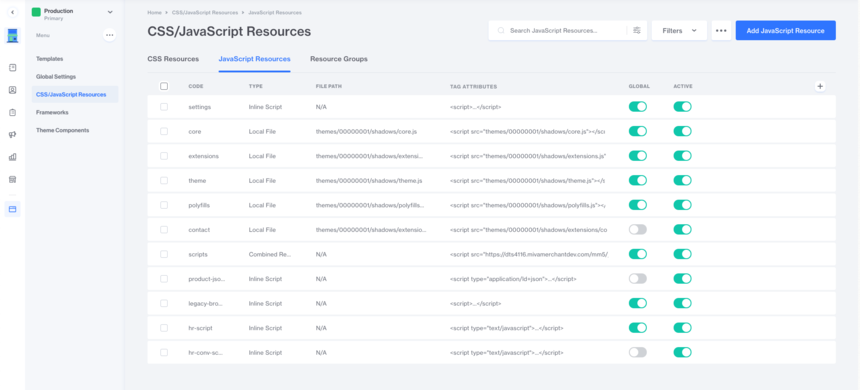
Log in to your Miva Merchant backend, navigate to User interface -> CSS/Javascript Resources and then click the Javascript Resources tab. You should end up here:
Click the blue Add Javascript Resource button in the top right corner to add a new resource. Set Code to "hello-retail-general", set Type to "Inline Script", and enable both Global and Active.
Click Save Changes.
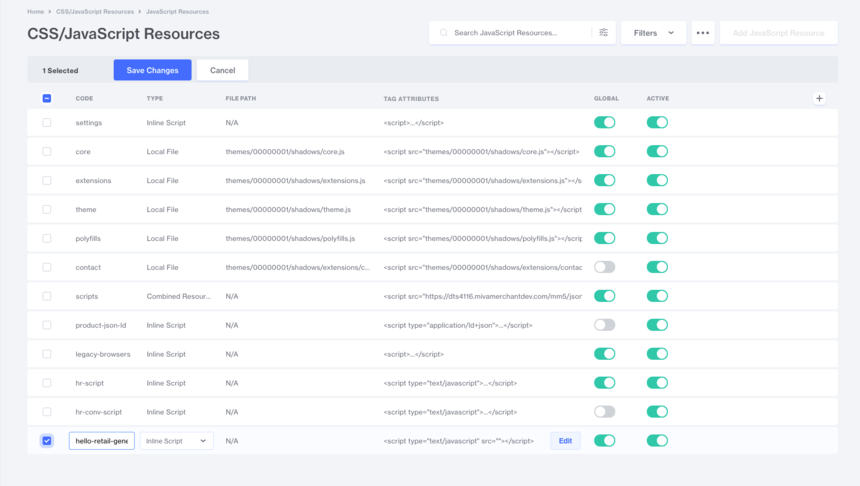
Select the hello-retail-general resource by marking its checkbox.
A button containing three dots appears at the top. Click it and select Edit Source.
A popup opens. Paste the following snippet into the editor:
(function() {
    var aws = document.createElement('script');
    aws.type = 'text/javascript';
    if (typeof(aws.async) != 'undefined') { aws.async = true; }
    aws.src = 'https://helloretailcdn.com/helloretail.js';
    var s = document.getElementsByTagName('script')[0];
    s.parentNode.insertBefore(aws, s);
})();
window.hrq = window.hrq || [];
hrq.push(['init', {}]);
hrq.push(['setCart', {
    total: '&mvt:global_minibasket:total',
    url: '&mvte:urls:BASK:auto_sep;Session_ID=&mvte:global:Basket:session_id',
    productNumbers: [<mvt:foreach iterator='item' array='global_minibasket:groups'>
        '&mvt:item:code',
    </mvt:foreach>]
}]);
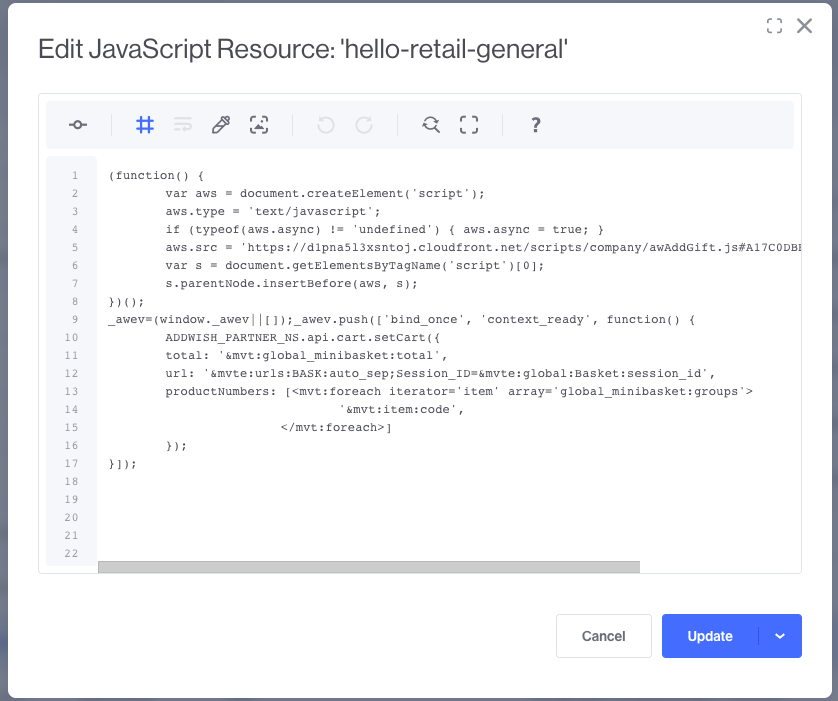
Click Update / Save after you insert the script.
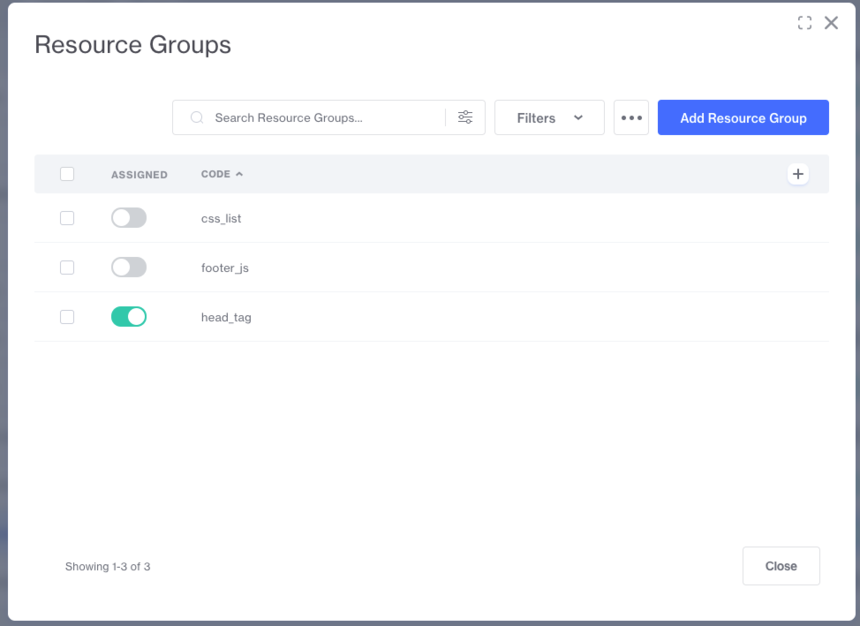
Click the three dots button again and select Resource Groups. 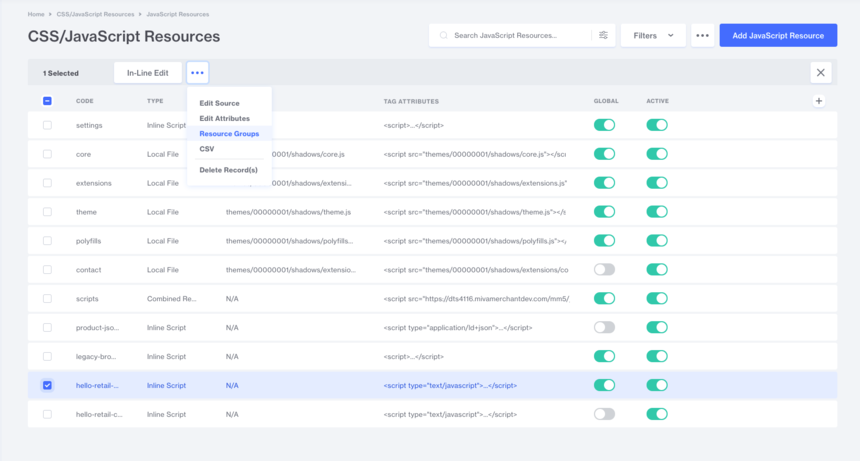
In the popup, toggle head_tag on in the Assigned column:
2. Insert the Hello Retail conversion script:
As with the general script, click the blue Add Javascript Resource button in the top right corner. Set Code to "hello-retail-conversion", set Type to "Inline Script", enable Active, and leave Global disabled.
Click Save.
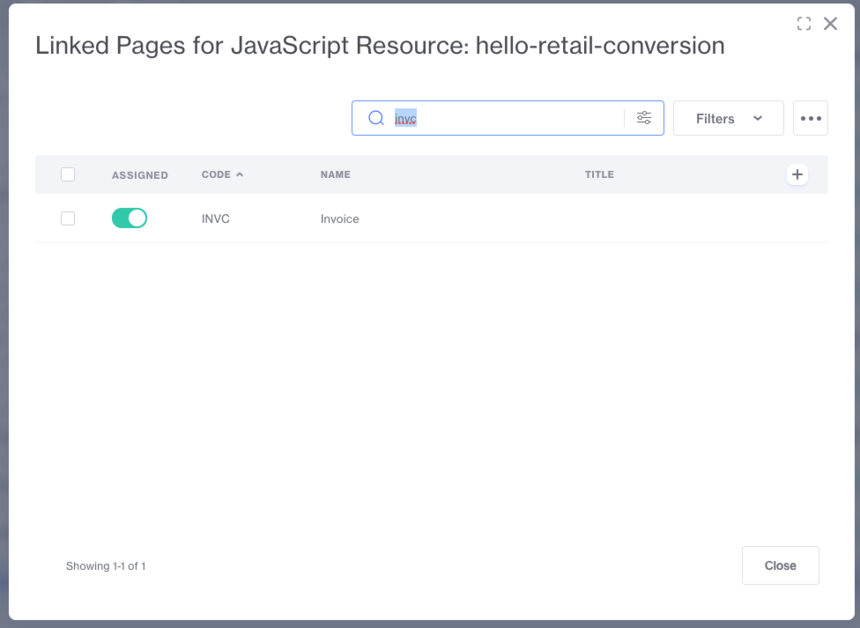
Select the Hello Retail conversion resource, click the three dots button, and select Pages. In the popup, choose the page where the script should load.

Search for "INVC" to find the invoice template and toggle it on in the Assigned column.
Click the three dots button again, select Resource Groups, and toggle head_tag on in the popup—just like for the general script.
Finally, click the three dots button, select Edit Source, and paste this snippet into the editor:
hrq = window.hrq || [];
hrq.push(['trackConversion', {
    total: '&mvt:order:total',
    orderNumber: '&mvt:order:id',
    email: '&mvt:order:bill_email',
    productNumbers: [<mvt:foreach iterator='item' array='order:groups'>
        '&mvt:item:code',
    </mvt:foreach>]
}]);
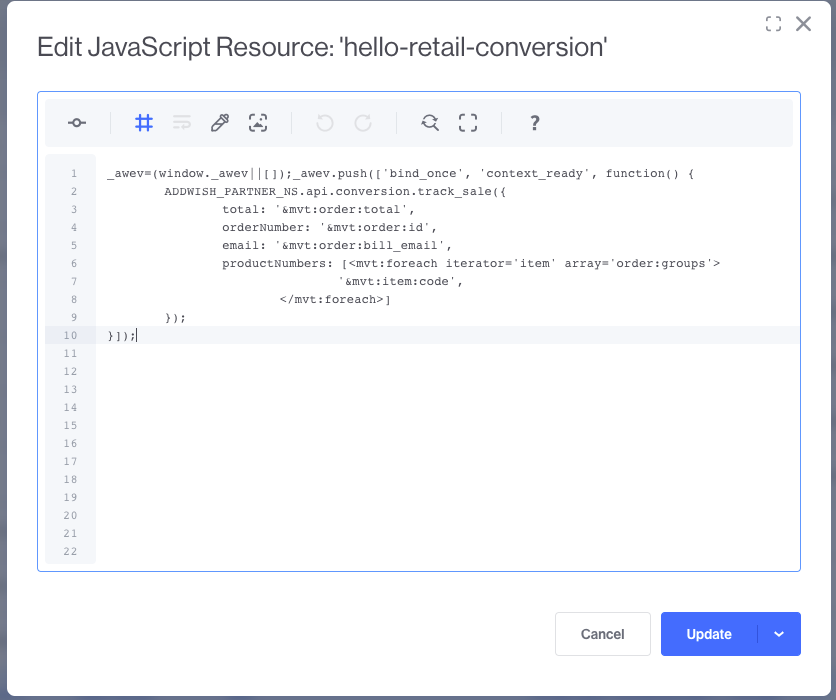
Press Save / Update.
3. Create API credentials:
Navigate to Settings -> User Management and click the API Tokens tab.
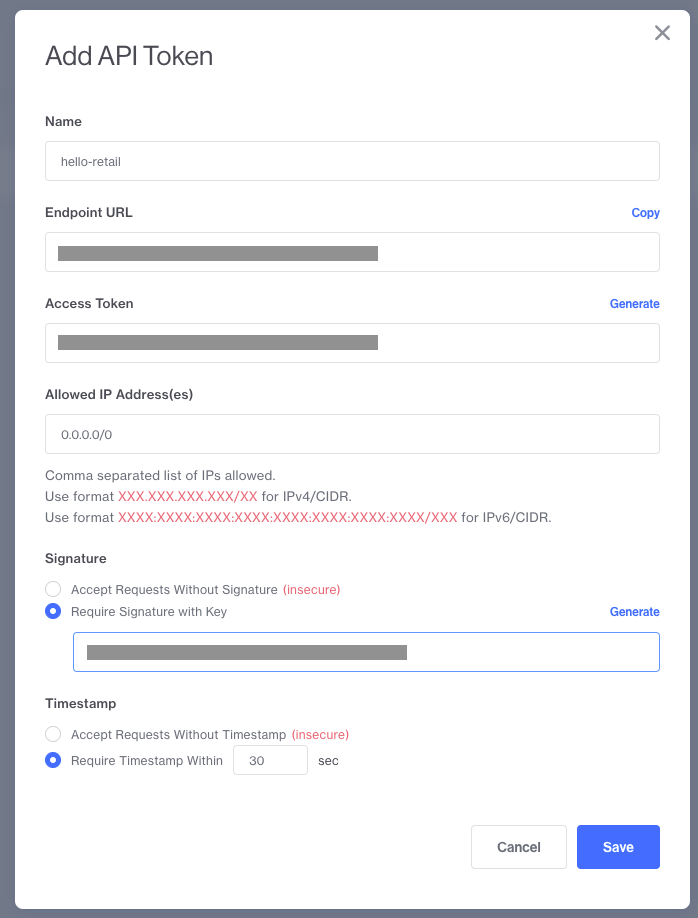
Click the blue Add API Token in the top right corner.
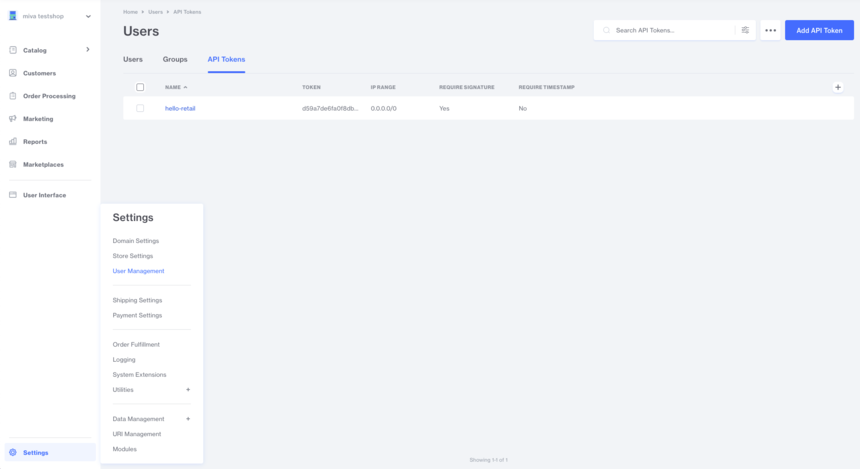
Name the token, add 0.0.0.0/0 to Allowed IP Address(es), and Generate then Copy the Endpoint URL, Access Token, and Signature. Keep these credentials for your Hello Retail setup.
Click Save.
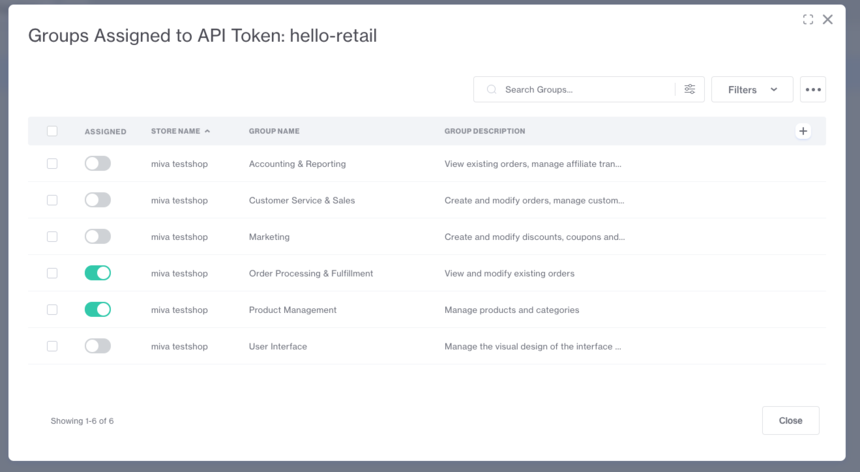
Select the API token by clicking its checkbox, click the three dots button, and select Groups. In the popup, assign access rights for this token. Toggle both Order Processing & Fullfilment and Product Management ON.
4. Create CSV feed for product discount prices and extra data:
Because the Miva Merchant API does not currently support price groups, it cannot provide final discounted prices for products affected by price groups.
Create a supplementary CSV feed to supply discounted prices.
This feed can also include any custom fields required for your Hello Retail integration.
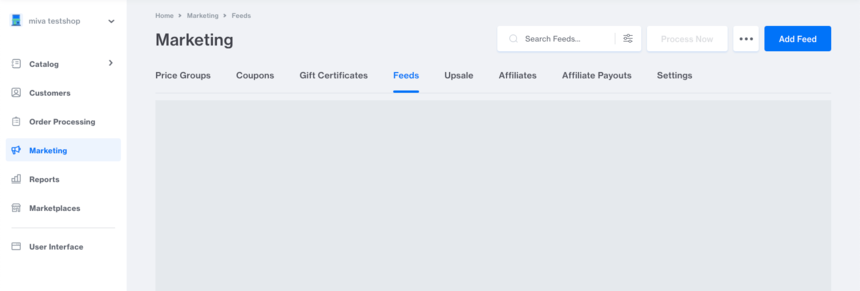
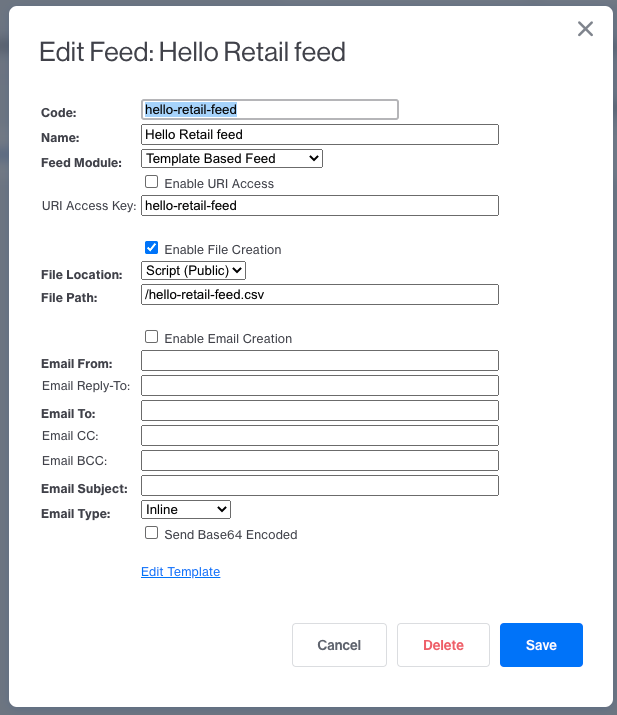
Navigate to Marketing -> Feeds and click the blue Add Feed button:
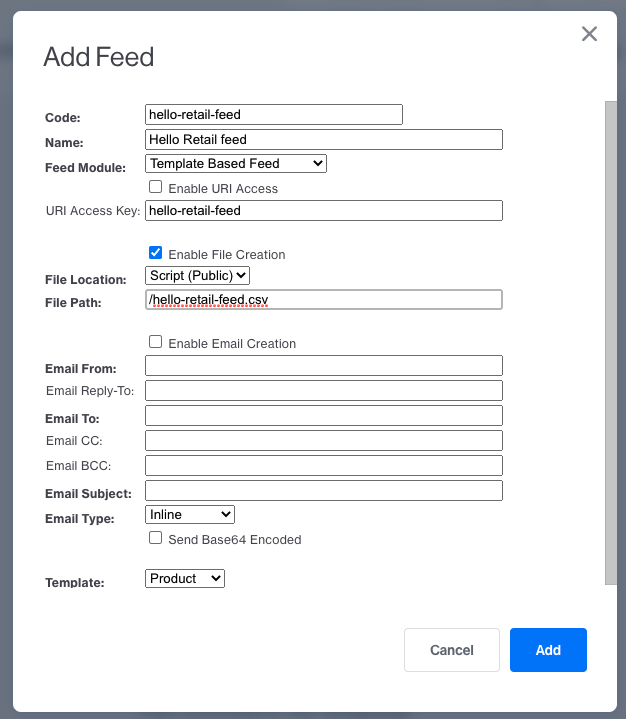
A popup will appear like the one below. We recommend using the same settings and names as the example. The settings Enable URI Access, URI Access Key, and any email settings are not required. At the bottom, select the Product template.
After you click Add, open the feed again and click Edit Template.
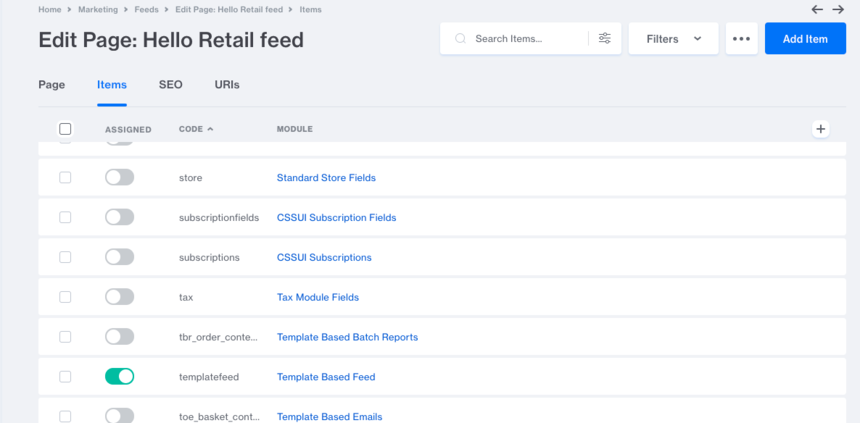
You should now be on the Edit page for the new feed.
Open the Items tab and ensure Template Based Feed and Standard Product Fields are enabled. Enable Custom Fields if you want to include them.

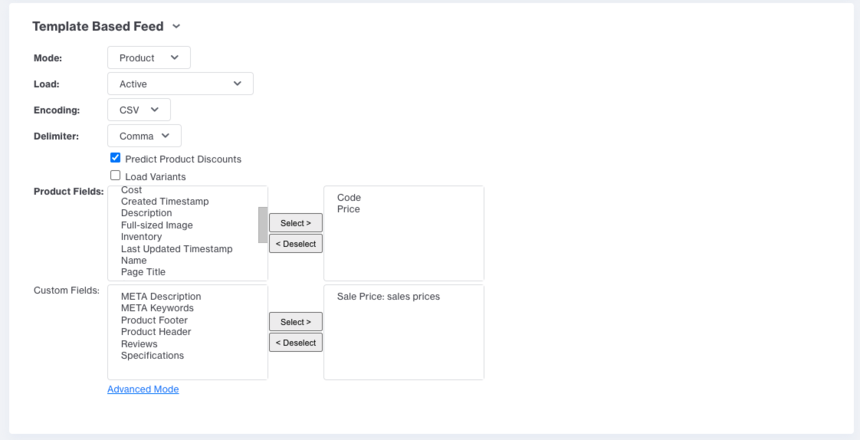
Return to the Page tab and scroll to the Template Based Feed section. Set Mode = Product, Load = Active, Encoding = CSV, and enable Predict Product Discounts.
Under Product Fields, include only Code and Price.
Under Custom Fields, none are required, but you can add fields useful for your Hello Retail setup.
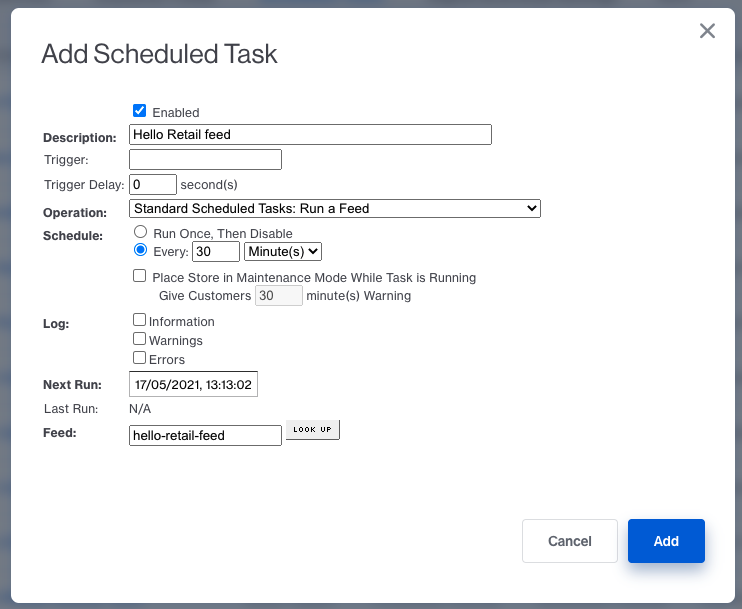
5. Create scheduled task to update the CSV feed:
To keep the feed updated, create a scheduled task that regenerates it automatically.
Navigate to Settings -> Store Settings -> Scheduled Tasks and click the blue Create New Scheduled Task button.
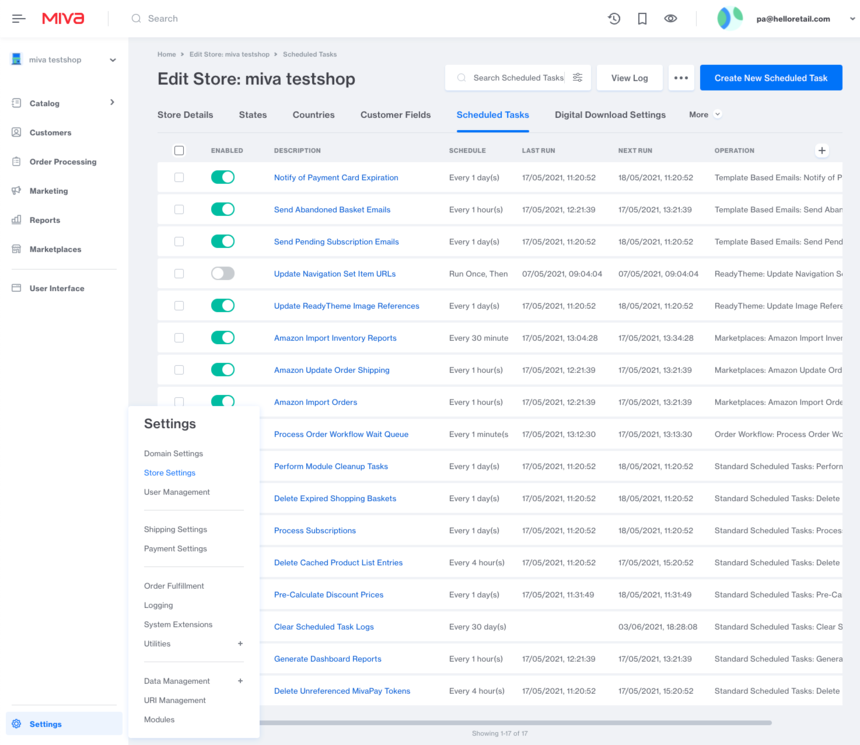
In the popup, set the schedule. We recommend running every 30 minutes. If you rarely change price rules, you can run it less often.
The Next Run field is populated automatically.
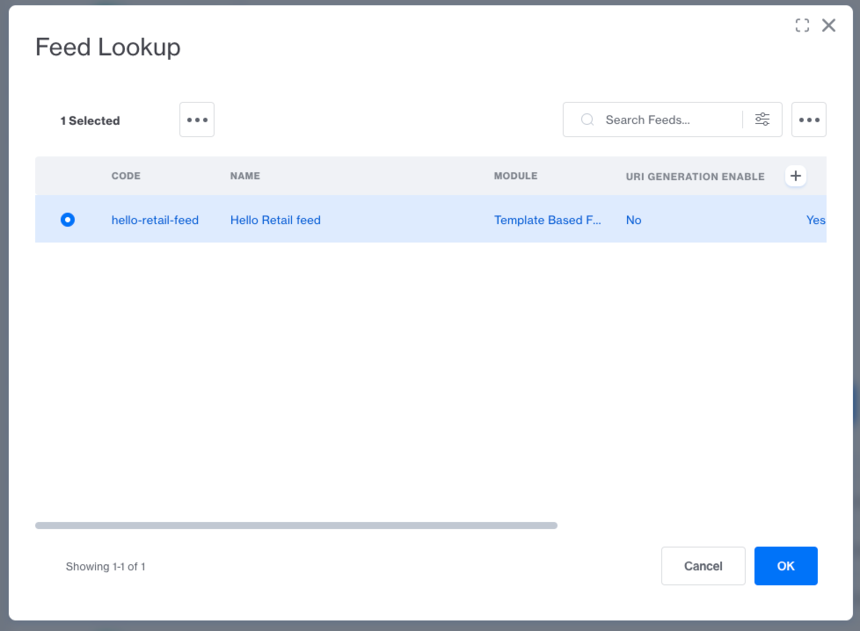
Click LOOK UP to select the Hello Retail feed you created (see image below), then click Add.
Note
If Hello Retail product feeds are blocked by Miva, contact Miva support and request that IP address 34.245.105.75 be allowed.
Configure Webshop
After the installation setup of your platform and the onboarding flow, make sure to have your webshop configured. Read this guide here on how to do so:
Visual Page Editor
If you are looking for support for the Visual Page Editor you can find it here.