 Avg. 11 min read
 Shopware Installation Guide
In this guide, you can read and learn about how to install the plugin for Shopware.
Note
The plugin supports Shopware 6.5 and 6.6. The repository for previous and current versions is available here: https://packagist.org/packages/helret/hello-retail
Hello Retail integrates with Shopware through a plugin that you install directly on the platform. Follow this guide to complete the installation and configuration.
Note
The plugin automatically installs the JavaScript snippet that handles view and click tracking, as well as conversion and cart tracking.
Important
The latest plugin introduces token-based security for feeds. After upgrading, send the Authorization token to support@helloretail.com to enable feeds.
Install the Plugin
Install the plugin using Composer:
- For Shopware version ^6.6, use plugin version 5.2.1
- For Shopware version ^6.5, use plugin version 4.4.1
If you're unsure which version to use, check the GitHub repository.
You can find the required Shopware version in the composer.json file.
Configuration
Once the plugin has been required with Composer, installed, and activated using bin/console, add the new Sales Channel.
- Log in to your Shopware Admin.
- In the left-hand menu, go to Sales Channel.
- Click the plus icon
 to add a new Sales Channel.

- Configure the channel:
- Set a Name such as Hello Retail
- Select the Storefront
- Select the storefront Domain
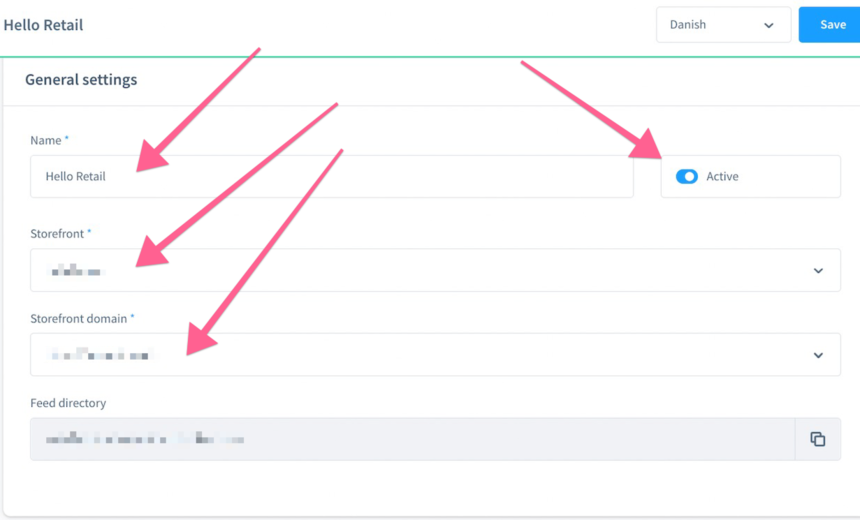
- Activate it and click Save.
-
After saving, the page reloads and shows the feed URLs for Orders, Products, and Categories.
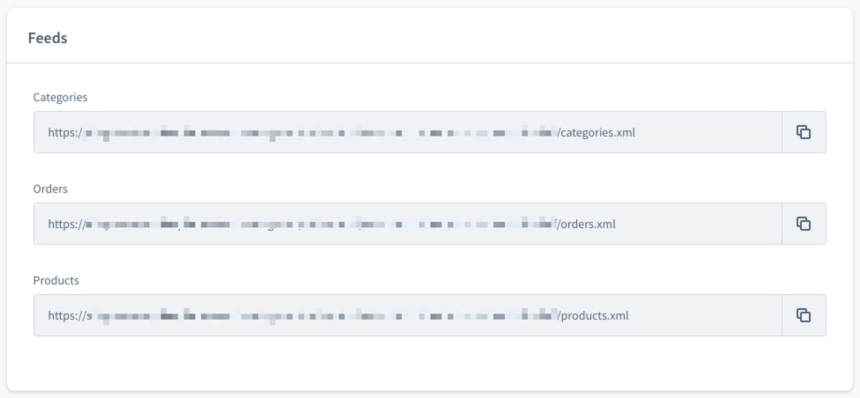
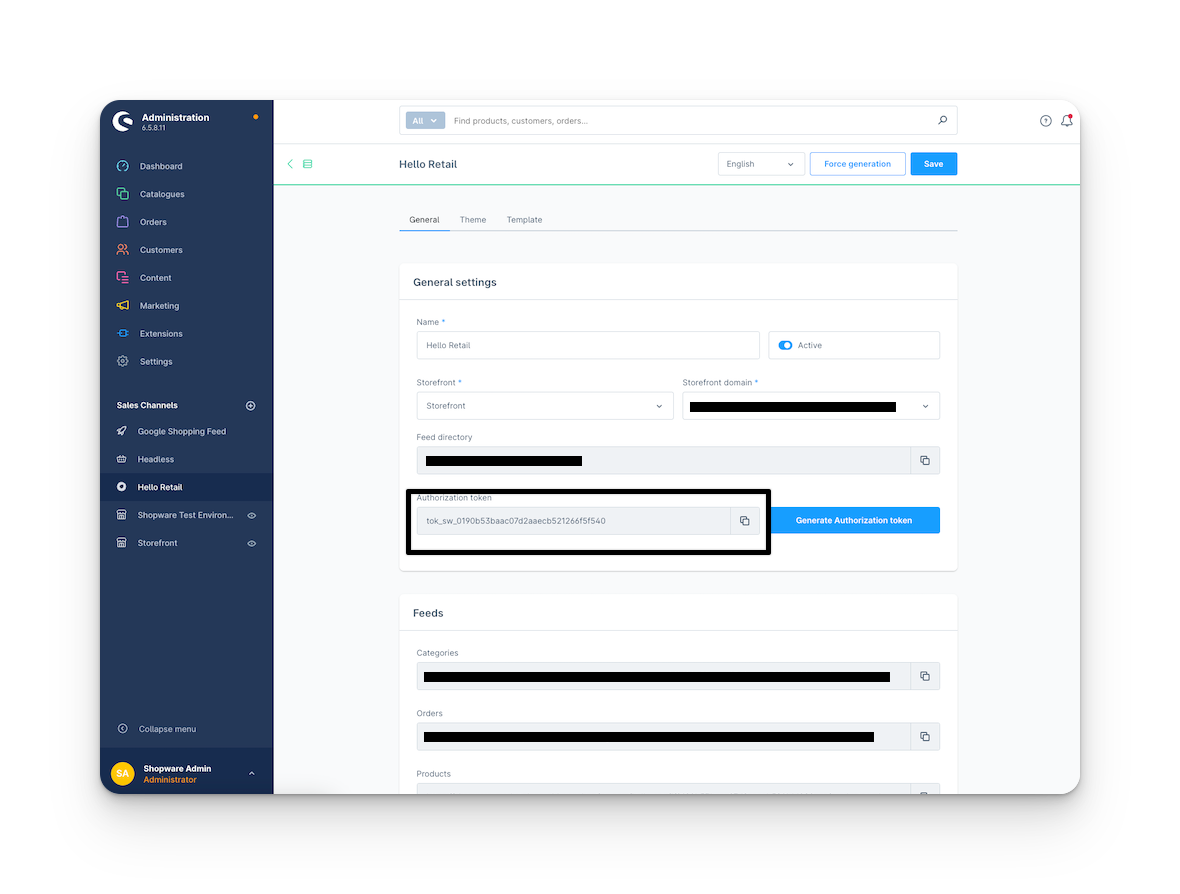
Copy these three URLs and the Authorization token, and send them to support@helloretail.com along with the shop domain. Save the Sales Channel.

Click "Force generation" to create the initial XML files required for Hello Retail.
To confirm the files have been generated, go to the appropriate server and run:

Initialize the Plugin
- Log in to your Shopware Admin.
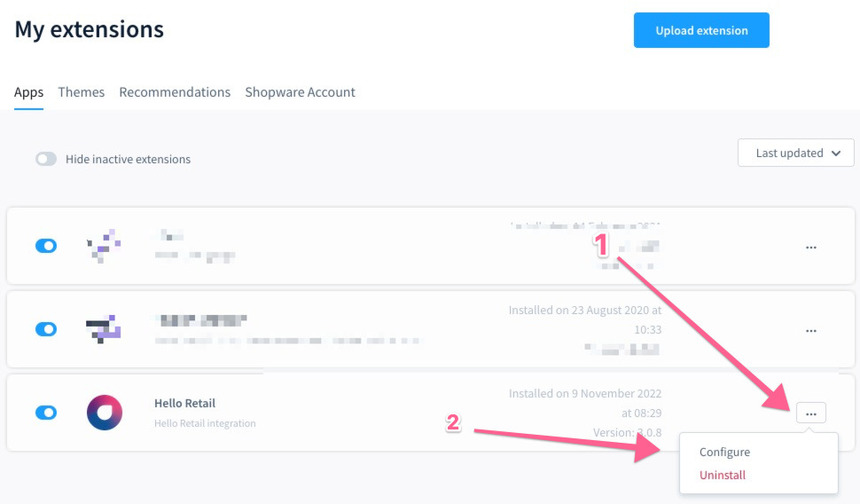
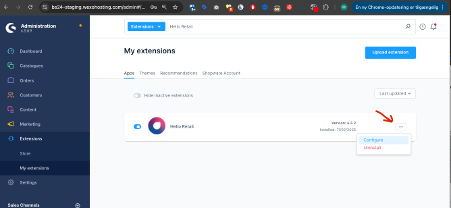
- In the left-hand menu, go to Extensions > My Extensions.
- Find the Hello Retail plugin, click the three dots, and choose Configure.
- When asked for the Hello Retail partnerID, enter
0.
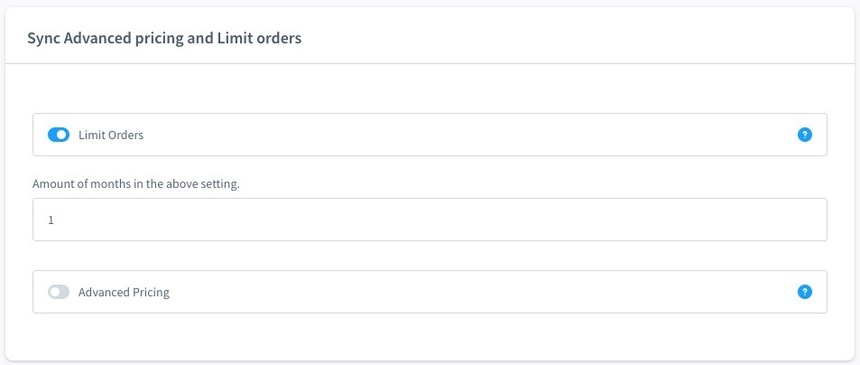
This field is mandatory in the module but no longer used by Hello Retail. - Sync Advanced pricing and limit orders
For the first sync, do not limit orders. Sending more historical order data improves Hello Retail algorithms and Audience insights.
After the initial run, you can limit orders to the last month to reduce load.
Read more about advanced pricing in Shopware here.
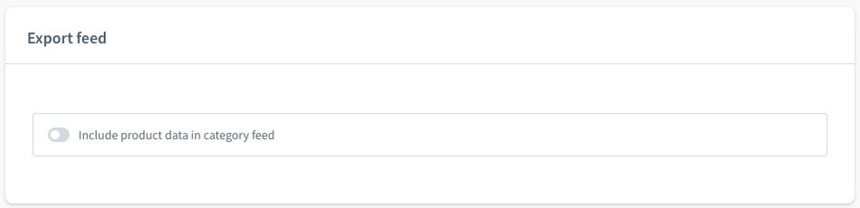
- Leave "Include product data in category feed" disabled unless explicitly required. Enabling it increases server load when category feeds are fetched.
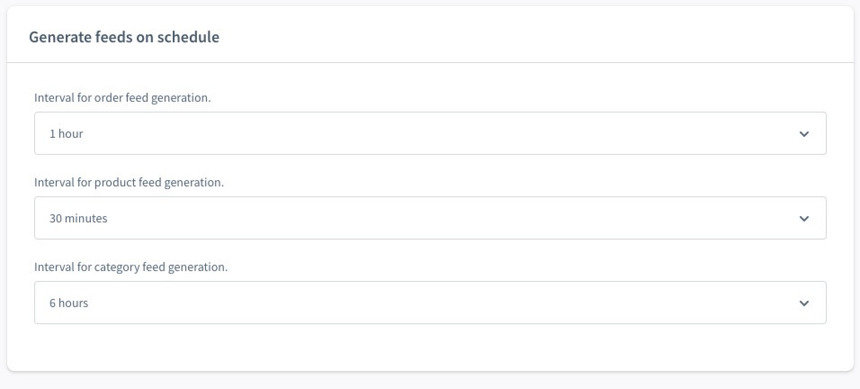
- For each feed (Orders, Products, Categories), select an update frequency.
Higher frequencies increase server load. We recommend the most frequent updates for Products, and less frequent for Orders and Categories.
Setting Up Data Feeds
Before you begin, make sure you have your login credentials for the Hello Retail dashboard:
https://my.helloretail.com/
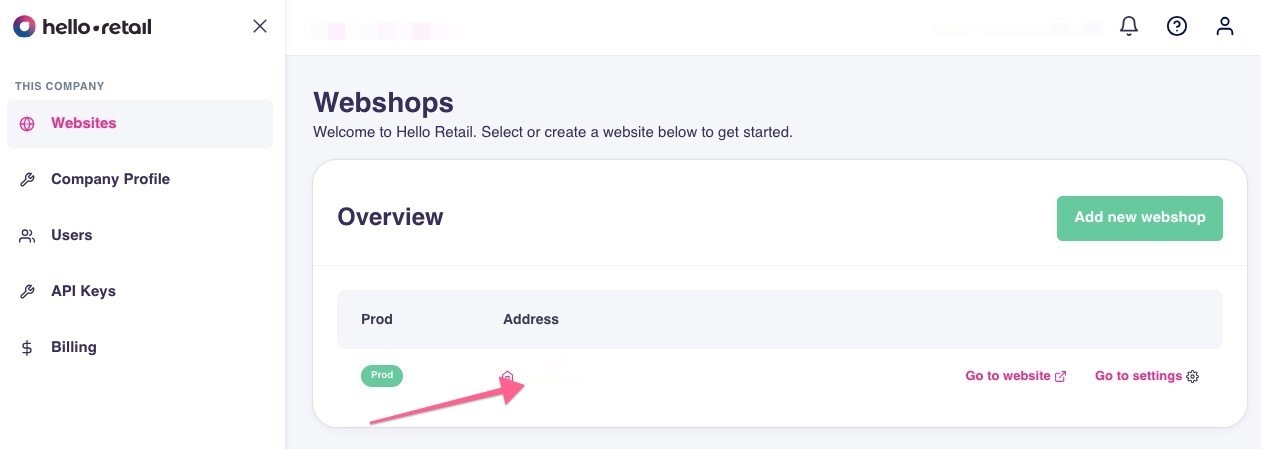
- Log in to the Hello Retail dashboard.
-
Select the webshop you want to configure.
 3. In the left-hand menu, go to Configuration → Data Setup → Feeds. 4. Click Feeds, then click Add New to create a new product feed. 5. Select XML as the feed type.
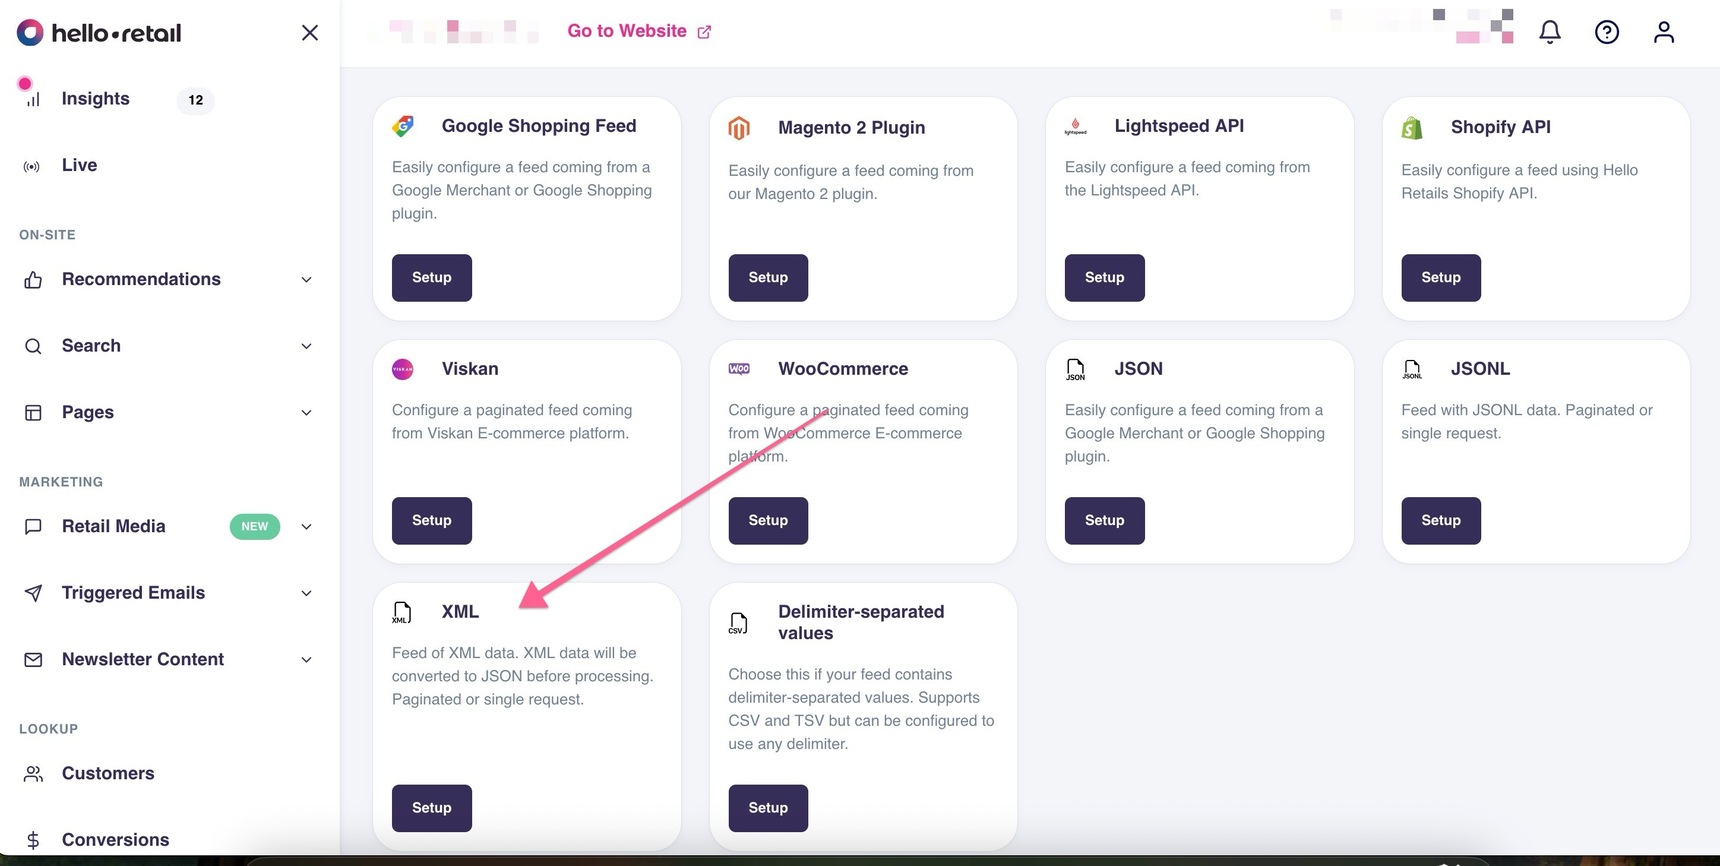 6. Enter the product feed URL for the webshop.
To find it, go to your Shopware instance, navigate to the Sales Channel, click Hello Retail, and then click Copy next to the Products URL. 7. Once the URL is entered, additional fields will appear. 8. Click Add header and fill in the following: - Header:
 Authorization- Value:Bearer tok_sw_XXXXX!!! warning The token above is an example. Use the actual token from the Hello Retail Sales Channel in Shopware.- For content and order feeds, send both URLs to support@helloretail.com and we will assist you with the setup.
Settings of the Product Feed
Once you've added the required Authorization token, adjust the feed permissions.
- Go to the Settings tab in the feed configurator.
-
Enable the options to create and delete products.
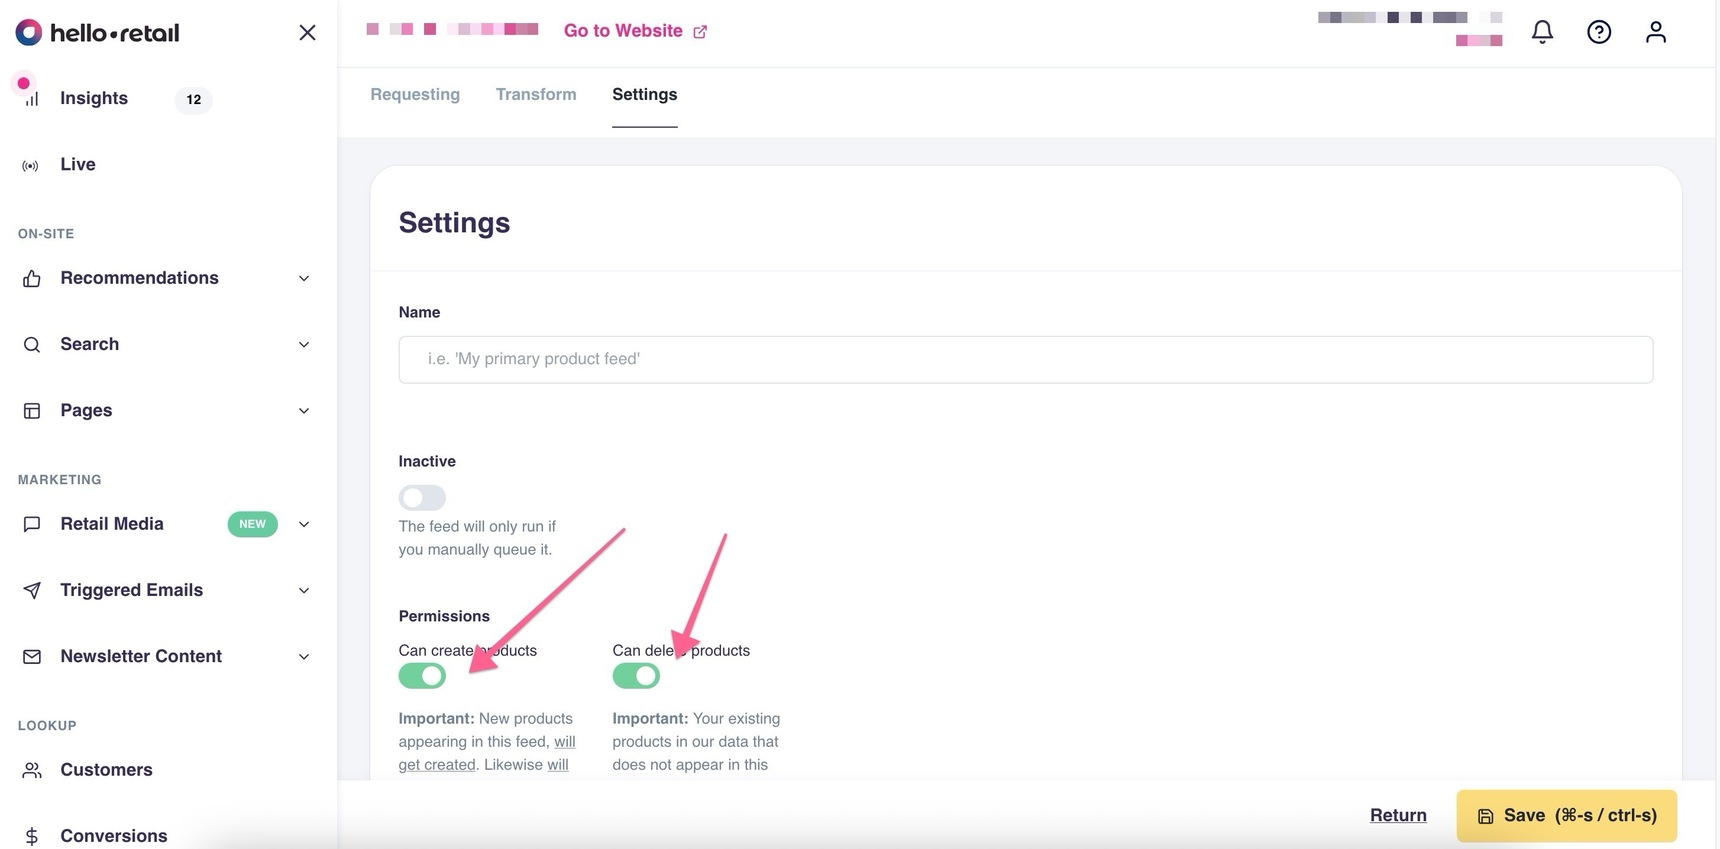
Note
These permissions only affect data inside Hello Retail. They do not modify your Shopware data.
Transformation & Feed Testing
After updating the settings, test the connection between Hello Retail and Shopware:
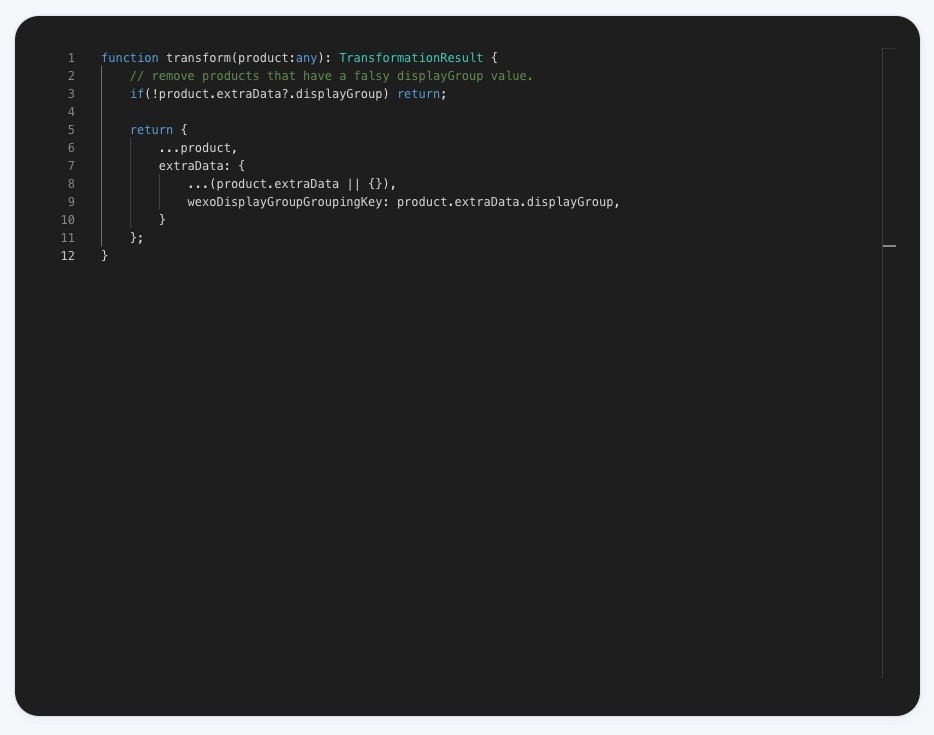
- Navigate to the Transform tab.
-
Add the following code snippet:
function transform(product:any): TransformationResult {
    // remove products that have a falsy displayGroup value.
    if(!product.extraData?.displayGroup) return;
    return {
        ...product,
        extraData: {
            ...(product.extraData || {}),
            wexoDisplayGroupGroupingKey: product.extraData.displayGroup
        }
    };
}
Want to learn more about how transformations work? Check out the transformation guide.
 3. Save the configuration. 4. Click Test feed (with 2 filters).
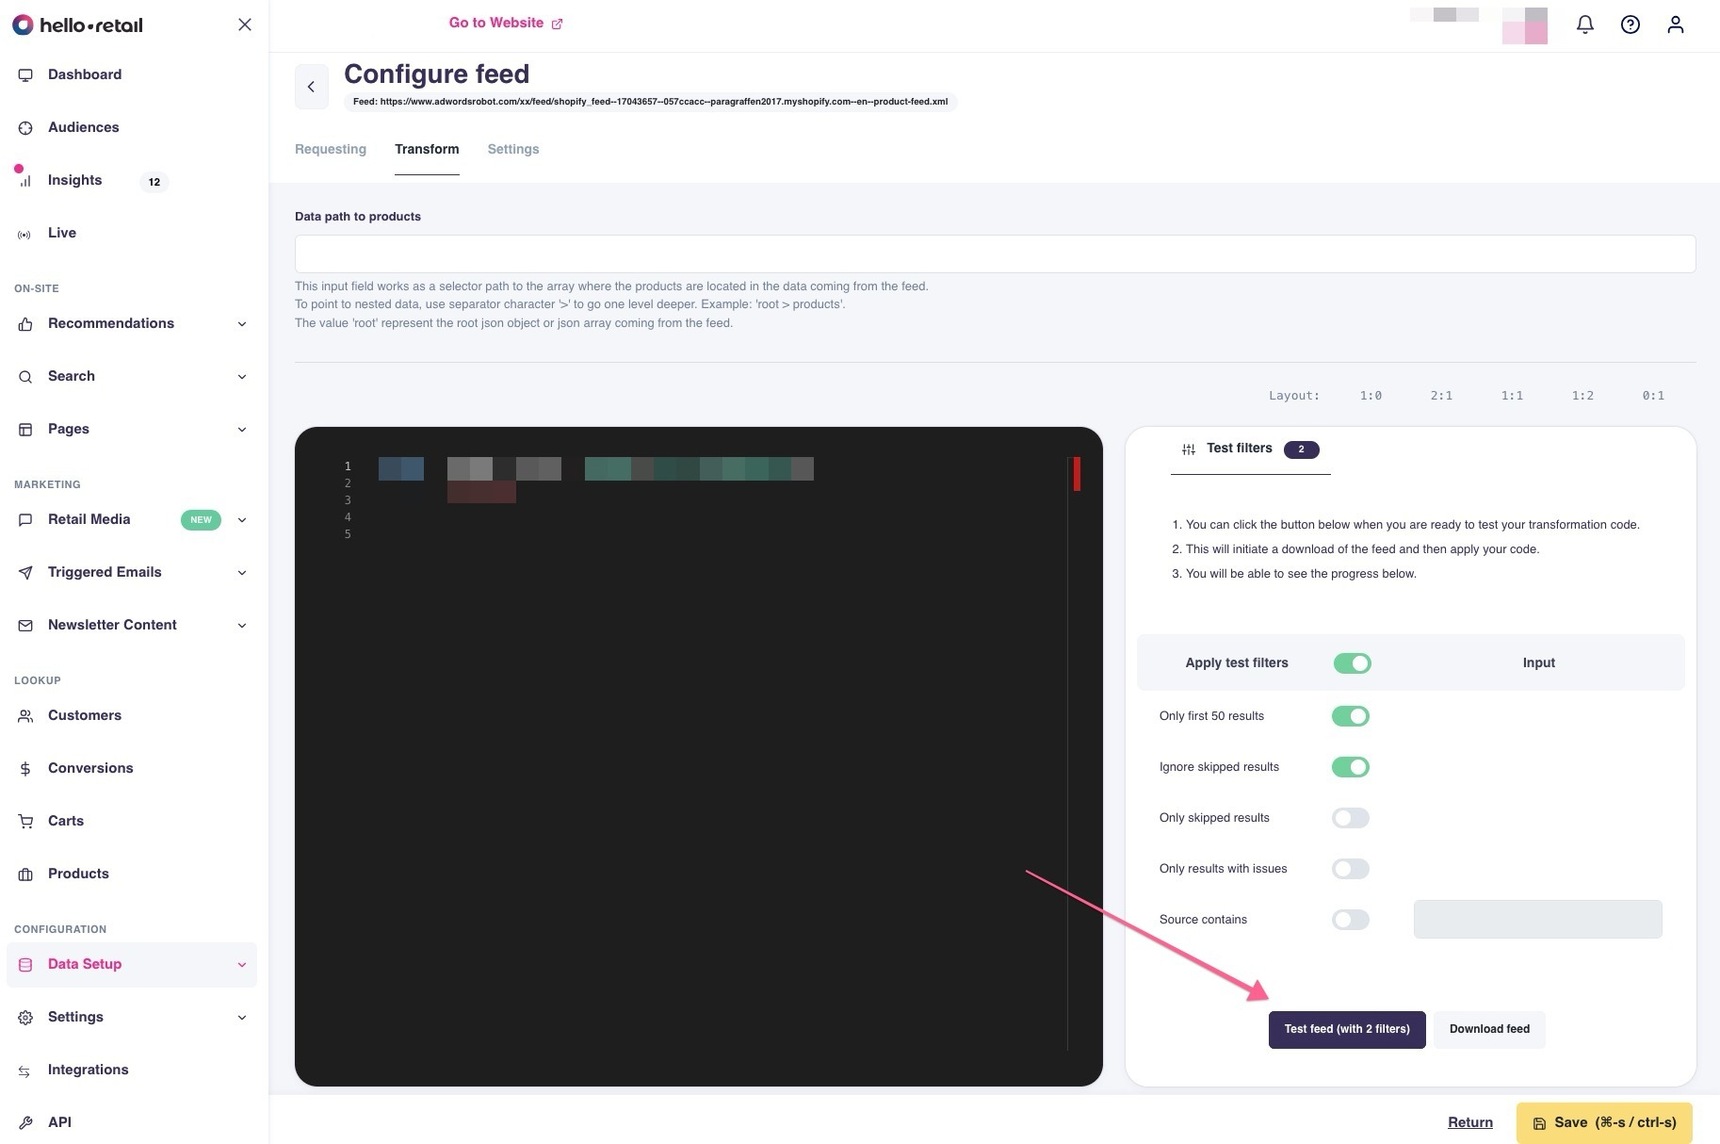
Before running the test:
-
Ensure the Data path to products is correctly set.
Typically, the correct path is:
root > products > product
This must match the structure of your generated XML file. -
Save the feed before testing.
Troubleshooting Tips
- If you run into issues, access the feed using Postman or a similar tool with the same Authorization header to verify access.
- Check if Hello Retail’s IP address is whitelisted on the server. If not, contact your system administrator.
Important Notes
-
Products without an
imgUrl(missing or empty image URL) will not appear in search results.
You can add a placeholder image either:- With a transformation rule in the Hello Retail dashboard
- Or by including it directly in the product feed
-
Set up a cron job to automatically export or generate the feed at regular intervals.
Setup of Product Recommendations
You can set up recommendations in two ways:
- By integrating directly with our API
- Or by using our managed templates
Not sure which option is right for you? Reach out to us at support@helloretail.com.
When using the API, you can place recommendation boxes within your existing Shopware design. To change the design, update your Shopware templates where you typically manage recommendation boxes. This version uses pricing from Shopware and respects price groups and configurations.
You can read here on how to get the product box key ID. Paste this key into the Recommendation ID field.
Setup of Personalized Search
You can implement Hello Retail Search in three ways:
- Integrated Search
- Managed Templates
- Direct API integration
Integrated Search is the fastest way to get started. With a few adjustments, you can power your existing design using Hello Retail’s API. It is a quick setup with minimal effort, but it does not support Redirects or Retail Media, including Banners.
Managed Templates offer prebuilt designs you can customize. Read more.
API integration gives full flexibility and control over the search experience. Read more.
Not sure which option fits your needs? Reach out to us at support@helloretail.com.
Integrated Search
Configuring the Hello Retail Search in Shopware
To access the configuration, go to the Shopware backend:
Extensions > My Extensions > Search for "Hello Retail" > Click the three dots > Select "Configure"
Scroll down to the Search section to find the following settings:
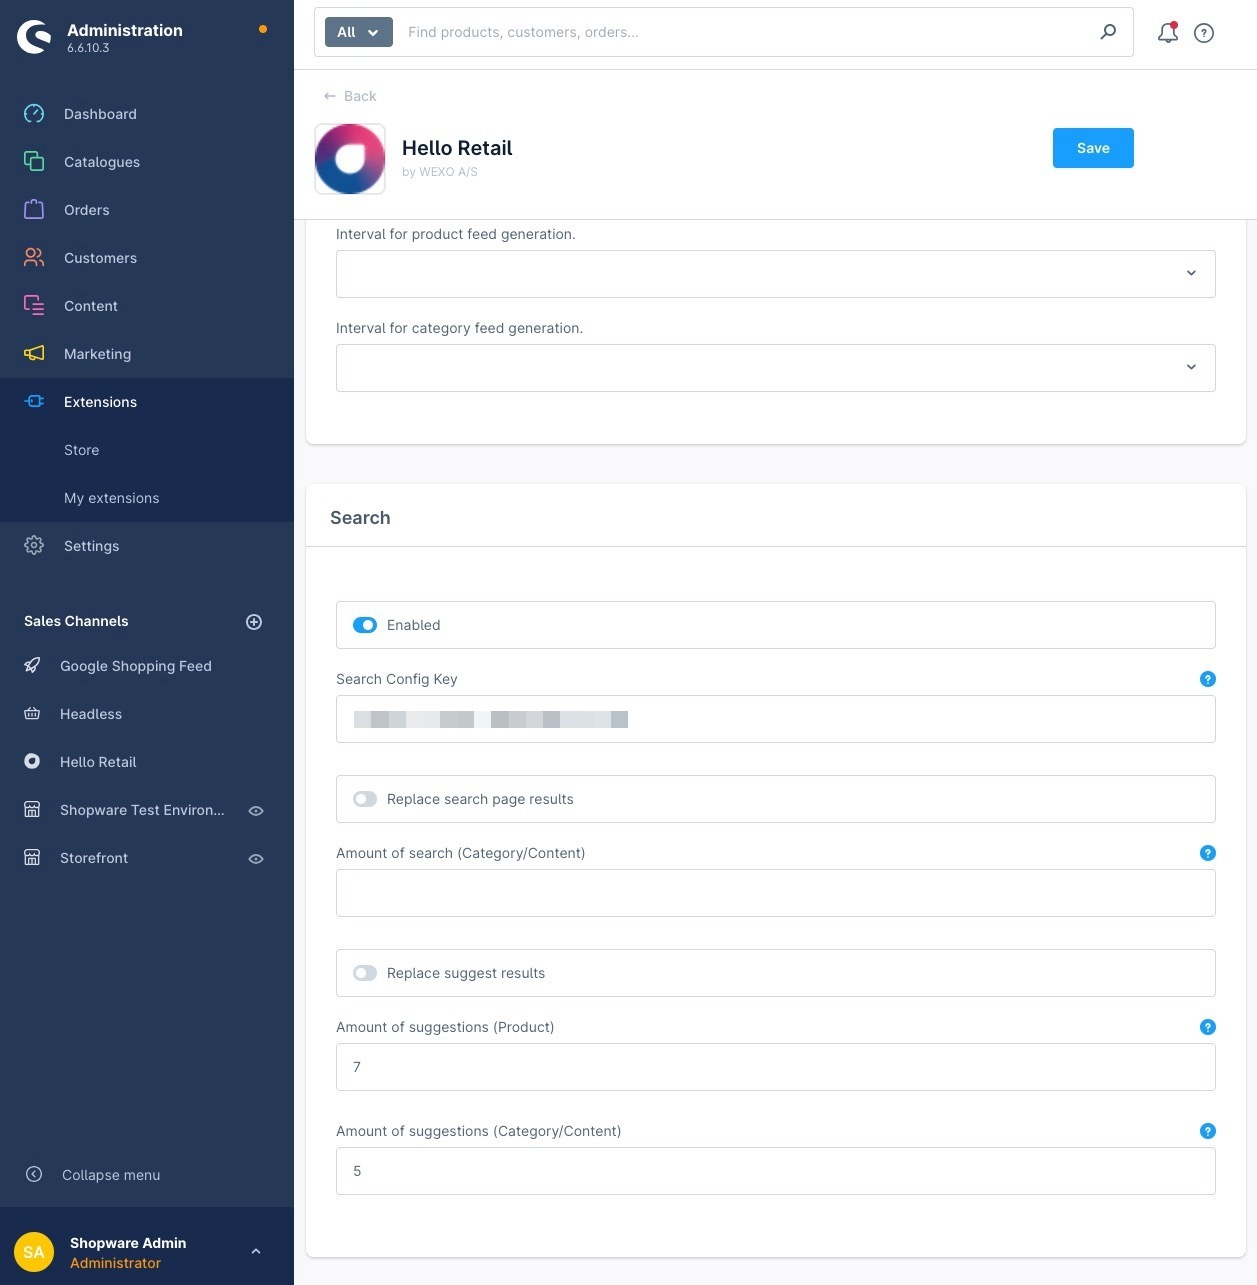
- Enabled
Enable or disable Hello Retail Integrated Search. When enabled, Hello Retail handles search via API. Disable this if you use the API directly or Managed Templates. -
Search Config Key
Find this in the Hello Retail Dashboard under Search > Overview.
The key works for all three search types and is most commonly used with the Overlay type.
Open the search configuration to locate the key.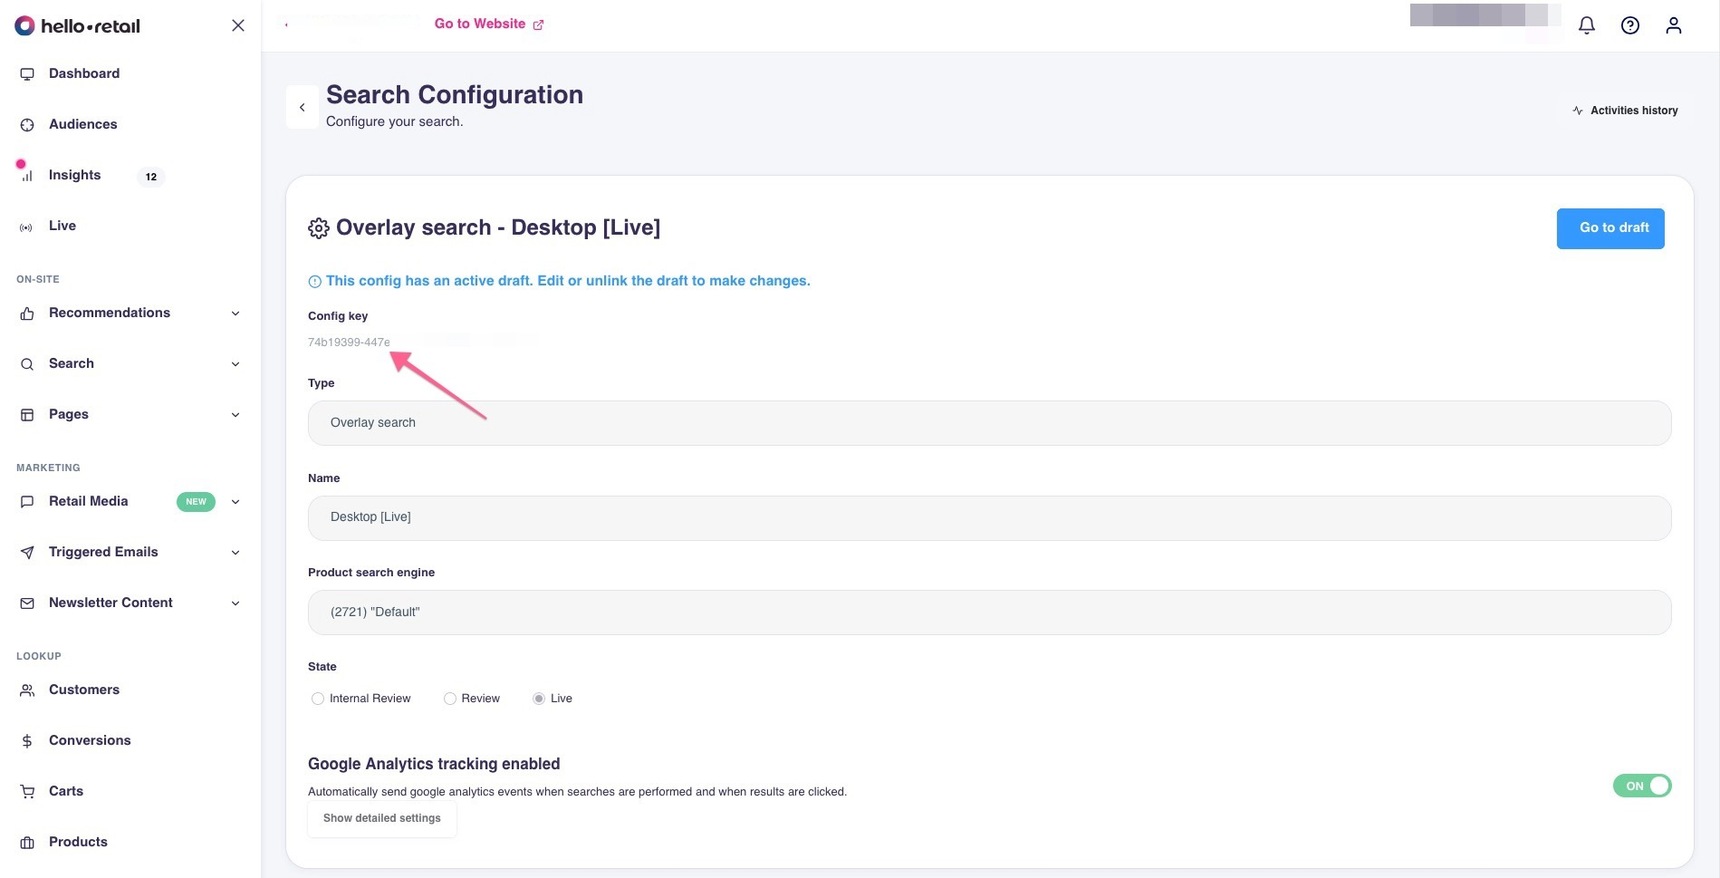 - Replace search page results
If enabled, the default Shopware search results page is replaced with Hello Retail data. - Amount of search results (Category/Content)
Number of category or content results to return. - Replace suggest results
If enabled, the default Shopware live search suggestions are replaced with Hello Retail data. - Amount of suggestions (Product)
Number of product suggestions in live search. If blank or 0, the default is 10. - Amount of suggestions (Category/Content)
Number of category or content suggestions to return.
Sorting and Filters
Sorting and filters on the frontend search results page are provided by Hello Retail.
Configure them in the Hello Retail Dashboard:
Search > Overview > Click the relevant search configuration > Filters and Sorting
Note
The display order of filters in the frontend is controlled by Shopware. Configure it under: Catalog > Properties
When you create new property groups in Shopware, they are automatically transferred to Hello Retail through the product feed once at least one product includes the new property.
Indexing and Grouping Configuration for Product Data
To ensure correct filtering and product listing behavior, update the indexing and grouping settings in the Hello Retail Dashboard.
Go to:
Configuration > Data Setup > Data Fields (select the Product Fields tab)
Fields that must be marked as Indexed:
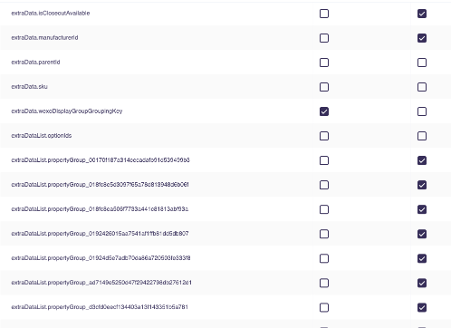
extraData.manufacturerIdextraData.isCloseoutAvailable- Required to support the hideProductsOutOfStock feature (ProductCloseoutFilter)
- All fields starting with
extraDataList.propertyGroup_- These power product filtering via Shopware property groups
Grouping Configuration
Under Product Group, ensure that only the correct grouping key is used:

- Only mark
extraData.displayGrouporwexoDisplayGroupGroupingKey(depending on your implementation) as the grouping key.- This is essential for correct product grouping and presentation in the Shopware storefront.
Important
- Products must be grouped by
extraData.displayGroup(orwexoDisplayGroupGroupingKeyif added via transformation). - If you modify or add
extraDatausing a transform, extend or copy the existing object. Do not overwrite it. - Remove products without a valid
displayGroup(handled in line 3 of the example transformation).
Search Engine Settings
To ensure correct search behavior:
Go to:
Search > Search Engines > [Product search engine] > Search Settings
Update the Show Variants setting to:
Show only the first variant of a product
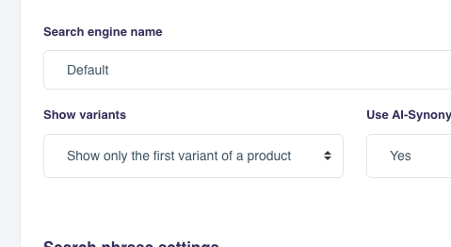
This prevents duplicate listings and keeps search results clean.
Category Setup
To enable category functionality, contact Hello Retail Support and request that they map or add the field extraData.id to your feed.
This is a managed feed, so you won't be able to modify it yourself via transformation.
Testing the Setup
To verify the setup, you can enable the Request Log:
- Go to API in the Hello Retail Dashboard
- Toggle Request Log to ON
Note
Disable Request Log after testing. If left enabled, it remains active for 7 days.