 Avg. 2 min read
 Back in Stock Trigger Design
This guide explains how to set up the design for back in stock triggered emails.
Prerequisite: You should already have a base design. Learn how to create one here. When the base design is ready, continue with this guide.
Steps on How to Set Up the Back in Stock Trigger Design
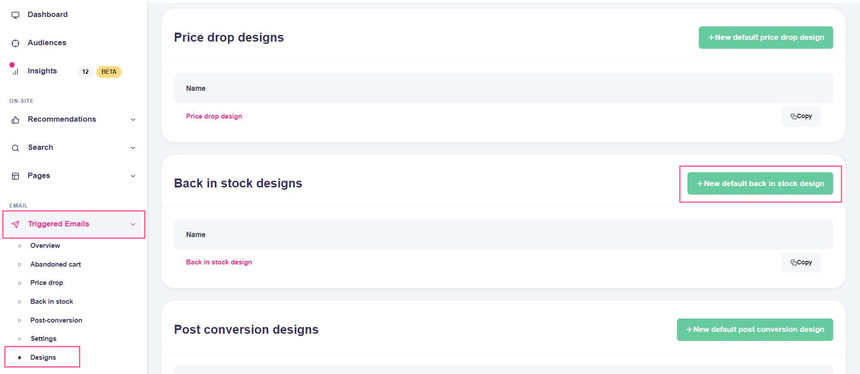
- Start by logging into your Hello Retail account. On the dashboard view, navigate to the left-hand side menu. Under the Emails section, click on Triggered Emails to unfold the drop-down menu.
- Next, from the drop-down menu, click on Designs.
- From the Designs page, click on the New default back in stock design button.
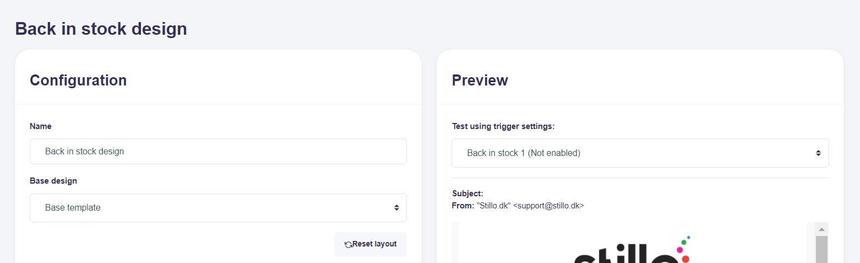
- Input a name for the design and pick the base design that you want to use for it. You might only have a single base design.
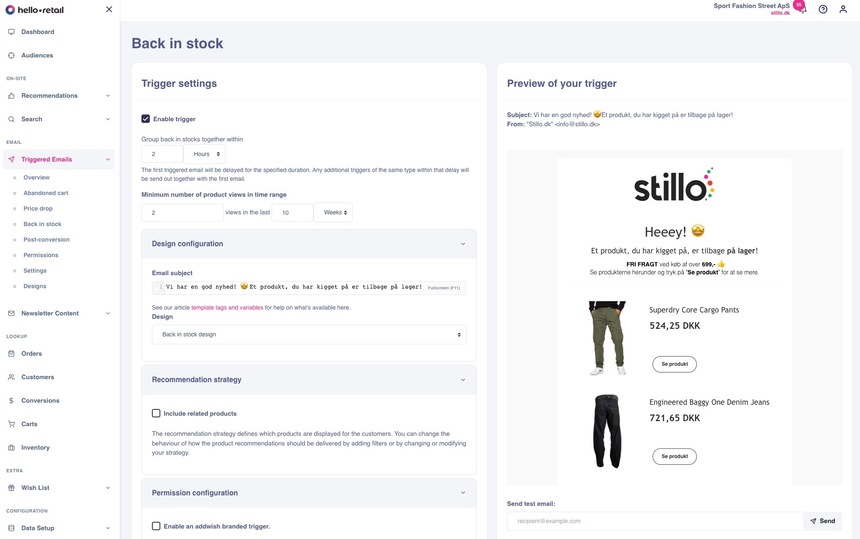
- From here, you can also fill out all the text boxes.
If your site uses a specific tone of voice, customize the email copy to match it.
Related products:
The back in stock email can include a section for related products. It shows items related to the product that is back in stock. Optionally, add a short description for this block.
Vouchers:
It is possible to include vouchers in the email if your shop system supports this.
If you do, insert the voucher and add a brief explanation.
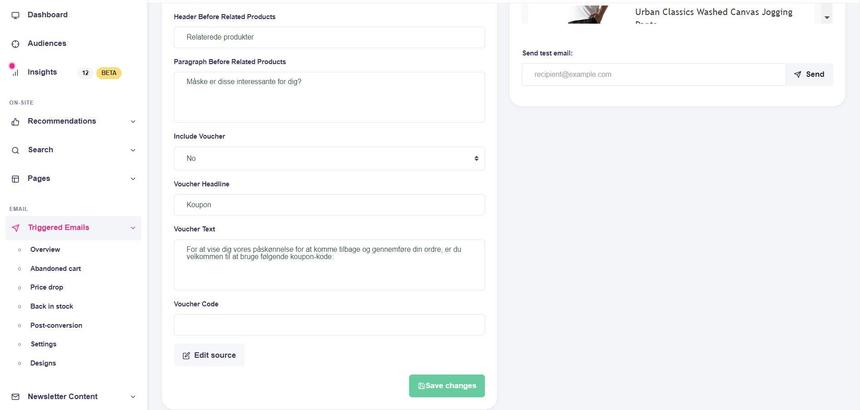
Finalize your content changes and save them by clicking the Save changes button.
You can also edit the code if you want to make more advanced customizations. To restore the default layout, click the Reset layout button at the top.
You can check the finished result by sending a test email.
Now that the design is ready, you can set up the trigger defining when the email is sent. You can read more about the different trigger types here.
If you have any questions about this guide, then please contact Support or your designated Account Manager about this.