 Avg. 3 min read
 General Settings for Triggered Emails
To start using Triggered Emails in Hello Retail, configure the general settings. These settings are used across all trigger types you enable. Hello Retail supports four trigger types: Abandoned Cart, Price Drop, Back in Stock, and Post Conversion. You can read more about the four different types here to learn more.
In this guide, we will look at Abandoned Cart and Price Drop as examples.
-
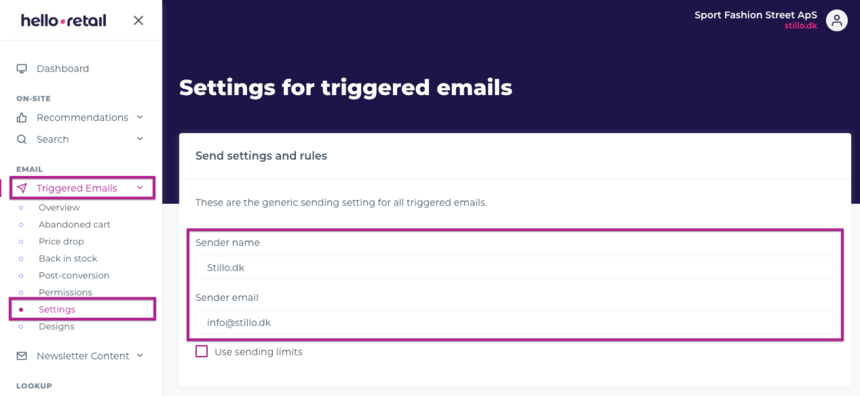
On the dashboard view, navigate to the left-hand side menu under the Email section. Click on Triggered Emails to unfold the drop-down menu. Next, click on Settings.
Choose and input your Sender name and Sender email. These will be used as the From name and address for sending email notifications to customers.
Optionally, you can also specify and enable sending limits if you need to restrict how often a recipient can receive triggered emails.
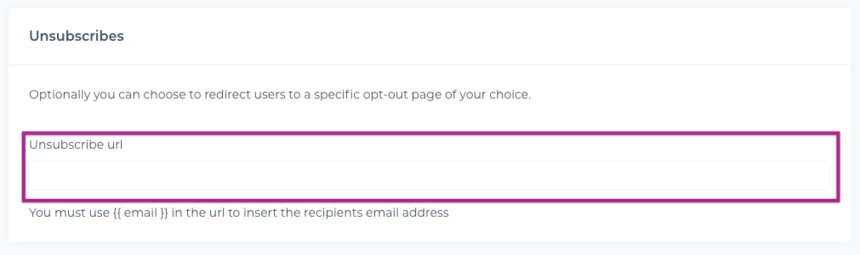
 2. Next, you can define a third-party unsubscribe URL if you want users to be sent to your own unsubscribe page when they click the unsubscribe link.
Note
You can use the {{ email }} replacement parameter to insert the user's email address in the link.
This is not required. If not configured, Hello Retail will show a default unsubscribe page when users click the unsubscribe link. This option is also available on the Settings page when scrolled down.
-
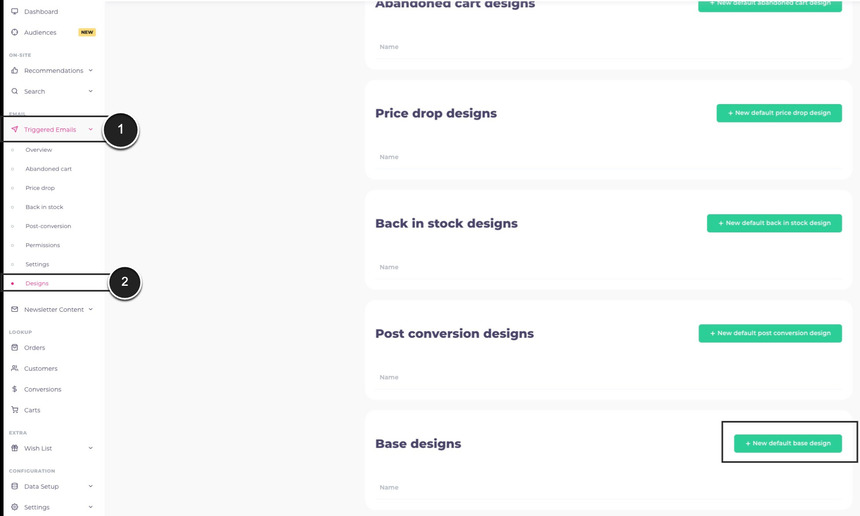
You can also define your design settings. To do this:
Click on Triggered Emails to unfold the drop-down menu. Then click on Designs. From this, you can click on the New default base design button, or create a design for a specific type of triggered email.
When prompted, configure the default design to be used across all your different trigger emails. You can change the font family and colors, reference your logo, and modify background and button colors.
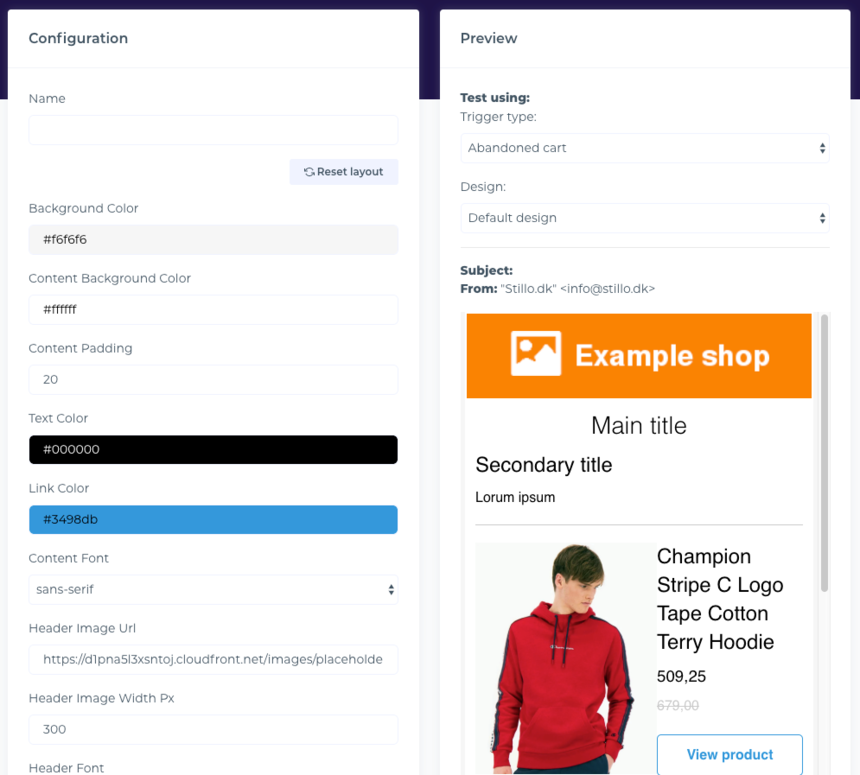 4. Once you are done with the design settings, remember to Save your settings.
Note
To edit the template source, switch to Source mode. Scroll to the bottom and click Edit source to modify the HTML and CSS directly.
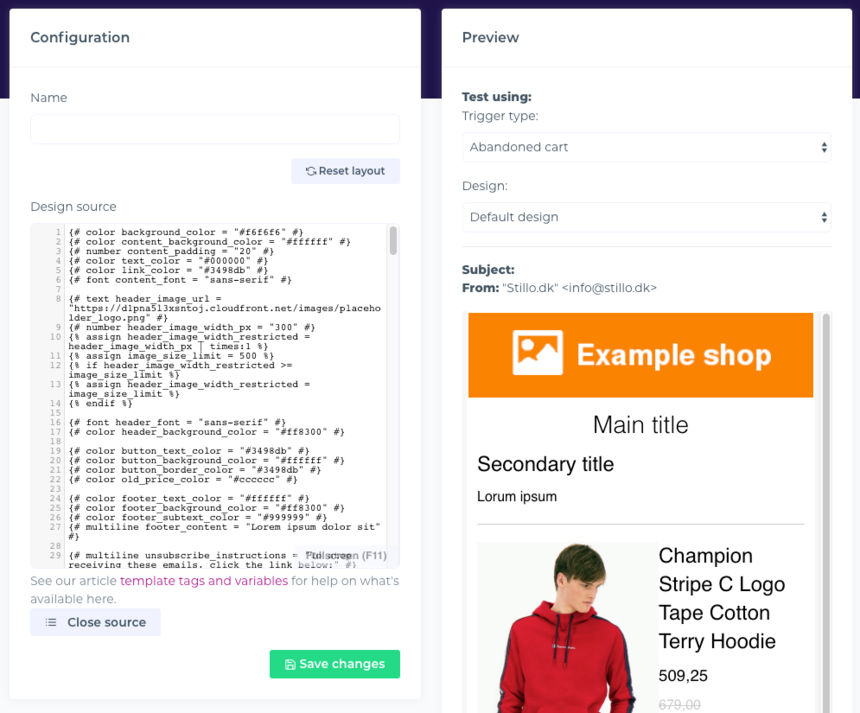
If needed, you can also send the completed triggered email to a test email account to preview how it will look before it is sent to your customers.