
ScanNet Installation Guide

Activate the Hello Retail module in ScanNet Webshop
ScanNet and Hello Retail work perfectly together. To make it very easy for you, ScanNet has a Hello Retail app that will make installation quick and easy. Follow the guide below to get started.
First off, log in to your ScanNet Webshop admin account: https://webshop-admin.scannet.dk/.
Install the Hello Retail app
Navigate to Apps and search for Hello Retail and click the Hello Retail app.

Click Installer app.

Click Indstillinger to start setting up the app.

The Hello Retail app is now installed and running, but there are still a few steps to go through before everything is ready.
On the next page, ScanNet pretty much covers what you need to do from here, but we will go through it here too.
Insert script in the header
Copy the listed code snippet to your clipboard (ctrl+c on Windows / cmd+c on mac):
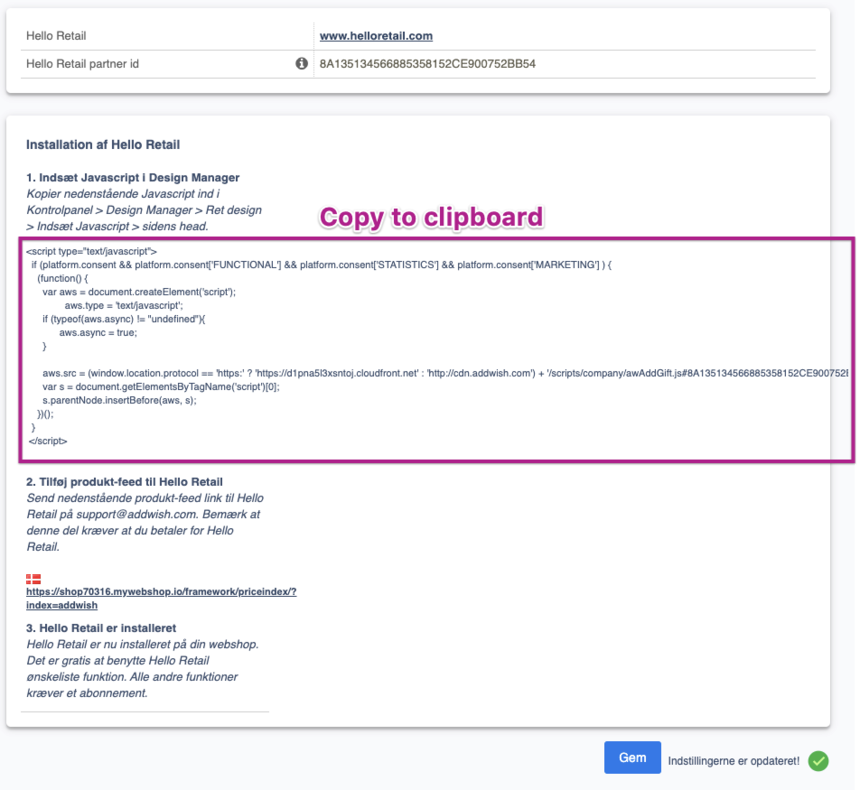
You have to insert the code in the header. You do that by navigating to Webshop -> Design and clicking Ret design on the listed active design.

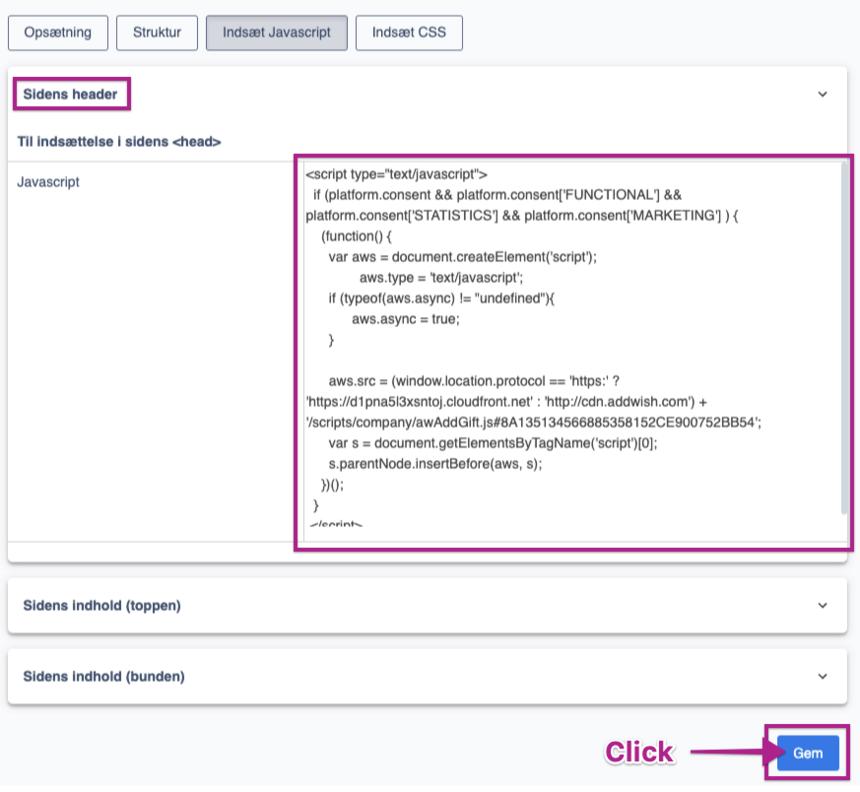
Click Indsæt Javascript

Paste the code snippet under Sidens header and click Gem.
Add your product-feed to Hello Retail
Please send your product-feed URL to Hello Retail support: support@helloretail.com
https://YOUR_WEBSHOP_DOMAIN.mywebshop.io/framework/priceindex/?index=addwishCreate a blank page for search results
You’ll need to create a new page, for Hello Retail to be able to display the search results to the user.
Here’s how you’ll create this new page in the site-tree:
Navigate to Webshop -> Sider and click Opret kategori.

Give the category a suitable title and make sure it is hidden. Click Gem.

Navigate back to Sider and create a new page in the newly created category.

Configure the page as specified in the screenshot below. The point is that the page should be visible for all but not listed in any navigation menus. Click Gem at the bottom.

The page is now created with the URL http://YOUR_WEBSHOP_DOMAIN/sogeresultater/ — please verify that the page exists and is available by visiting the URL.
Once you’ve verified the page exists, please send the URL to Hello Retail support: support@helloretail.com along with the name of your shop. The next section will also end with you sending information to Hello Retail, so you can include both in the same email.
Provide historical order data
To optimize Hello Retail recommendation algorithms, you can provide a historical order feed, for Hello Retail to analyze. Please follow these simple steps to generate a historical order feed:
Navigate to Ordrer -> Alle ordrer and click Eksportér.

Chose Ordrer and the format XML and click Næste.

In this step, you'll have to select the data to share with Hello Retail – please select the following:
- Ordre - Generelt - Total
- Ordre - Ordrelinjer - Produkt id, Varenummer, Produkt titel, Variant titel, Diverse titel, Antal, Pris
- Ordre - Kundeoplysninger - Kunde e-mail


Please also make sure to select orders based on Period, reflecting the last two years:
- Check the radio button: Efter periode.
- Change the Start date to go back two years.
Click Næste when done.

As the final step, provide a name – e.g. Hello Retail and click the Download button:

Now, please send this historical order feed to support@helloretail.com, and we will upload the data to our system. Then you will get a jump-start on the amount of data for our recommendation algorithms, creating an overall better user experience for your customers and a higher conversion rate for you.
Configure Webshop
After the installation setup of your platform and the onboarding flow, make sure to have your webshop configured. Read this guide here on how to do so: